Pre-Sale Information
How does ExpatTV work?
We provide a turn-key service that brings you live, high-definition TV programming in English from the U.S., Canada, and the U.K, as well as channels from other parts of the world. You connect a small streaming device to your TV via an HDMI cable, and to your Internet router via an ethernet cable or via wifi. ExpatTV then uses your Internet service to access our servers and content.
We also have apps that can bring you ExpatTV on your iOS devices (iPads and iPhones), Android devices, and Windows 10/11 devices.
We have every live TV channel you can imagine, including premium movie channels, local network channels from most major cities in the U.S., provincial/regional channels from Canada, countless sports channels, all major sports packages, and all major events and pay-per-view events. We also provide a huge (and growing daily!) library of on-demand movies, TV series (with no commercials!), documentaries, events, stand-up comedy, concerts, and more. New movies and episodes are added daily, and we take requests!
ExpatTV is very easy to use – it operates just like a cable/satellite system with a remote control. No complicated and frustrating Chinese Android boxes, Firesticks, keyboards, or mice. Just turn it on and it works like your TV from back home!
What do I need to use ExpatTV?
To take advantage of our ExpatTV service, you need two things:
- A television or other device that you can use for streaming. You do NOT need a smart TV – just a TV with an HDMI port. We also support Windows 10/11 devices, iOS devices (iPad / iPhone), and Android phones, tablets, and other devices. Our apps do NOT support casting or AirPlay from your device to your TV. To use a conventional television, you need one of our Gen2 or Gen3 streaming systems.
- Internet service with a consistent download speed of at least 20 megabits/second. To test your speed, use speedtest.net or speed.com. We recommend a “wired” provider over a wireless provider (radio/microwave), but we have many clients that use ExpatTV successfully via wireless Internet service. Our service also works well with Starlink satellite Internet service. For more information on Internet providers, see the FAQ “Which Internet service providers (ISPs) work best with ExpatTV?” and “What about cellular Internet service from Telcel or AT&T?” below.
What is the cost of ExpatTV?
We have only one content package that includes all live TV channels and all on-demand content that we have available. The cost of the service is $30 USD or 600 MXN per month for the first TV/device. For the second and subsequent TVs/devices that are in use at the same location/household, using the same Internet service and the same public IP address, we offer a discounted price of $20 USD each or 400 MXN each per month. This discount does not apply to commercial accounts. This is a one-time discount – if your systems/devices do not qualify for this discount at any given time, the discount is lost permanently.
Our prices are fixed in U.S. Dollars (USD) and in Mexican pesos (MXN) and do not vary with the USD:MXN exchange rate.
Each conventional TV requires its own ExpatTV system. We have two tiers of hardware that we offer, both of which include all programming:
1) Our ExpatTV Gen2 streaming system is a greatly upgraded system over our original Gen1 device with a much faster, friendlier, more intuitive, modern user interface, an enhanced TV guide, closed captioning on many live TV channels, more options for searching to find channels, and many other features. The one-time cost of a Gen2 system is $150 USD or 3000 MXN.
2) Our ExpatTV Gen3 streaming system offers all the features of the Gen2 device, plus DVR functionality. You can do ad-hoc recording of live TV, scheduled and recurring recordings, picture-in-picture, and watch one live TV channel while recording another. You can also pause/rewind/fast forward live TV, which, among other features, allows you to skip commercials while watching live TV. Our Gen3 systems use a newer version of our app than do our Gen2 systems, so there are differences in the user interface, but both are very intuitive. The one-time cost of a Gen3 system is $300 USD or 6000 MXN.
How do I pay for ExpatTV?
We use a secure payment processor in the U.S. and the vast majority of our clients pay via credit card or debit card from the U.S. or Canada. Mexican cards and cards from other countries will usually work as long as they allow international transactions (because the payments occur in the U.S). The majority of our clients set their payments to auto-pay for convenience.
For payments in Mexican pesos (MXN) we can accept transferencias interbancarias from your Mexican bank account to ours. We can also accept payments in cash (MXN) via deposits at branches of our bank. At present we are not able to accept payments at Oxxo or at other retail locations.
Do you have a list of available channels and other content?
We do not publish a list of channels or other content, but we have over 1700 channels (up to 2000+ on days with many sporting events), mostly in English from the US, Canada, and the UK, including Premium/Movie channels, local channels from more than 85 markets/cities in the U.S., all major news networks, and all major sports packages. We also have a huge library of on-demand movies and TV series (without commercials). And if we don’t have channel or on-demand content that you want, you just request it and we will add it if possible.
I live part-time in Mexico or another country and part-time in Canada, the U.S., or elsewhere. Can I use ExpatTV on a “seasonal” basis?
Yes, you can use ExpatTV on a seasonal basis as long as you own the equipment. Just notify us when you want to pause the service, and again when you want to reactivate it. For more information see the FAQ “How do I pause and reactivate my ExpatTV service?” below under General Information.
However!
Please keep in mind that ExpatTV works anywhere in the world as long as you have reliable Internet service. Very few of our “snowbird” clients pause their service – they instead take their ExpatTV system back to their other home, or anywhere else they travel!
Early clients had the option of renting the equipment and therefore they do not own it. In these cases, we can only pause your ExpatTV service if you purchase the equipment.
Do I need a VPN to use ExpatTV?
No VPN is needed to use ExpatTV. The servers are ours and they are dedicated, used exclusively for ExpatTV, and we do not impose any geographic restrictions. ExpatTV will work anywhere in the world as long as you have reliable, consistent Internet service. The only circumstances under which we recommend use of a VPN is if you are experiencing routing, congestion, or saturation problems between your ISP and our datacenters, or if you suspect that your ISP is blocking or throttling your traffic or otherwise playing games with you.
How do I order ExpatTV?
Due to import restrictions by the Mexican government and U.S. tariffs, we no longer sell the equipment needed to use our ExpatTV service. Instead, new clients order their equipment from Amazon US, Amazon Canada, Amazon México, or elsewhere. Place an order on our website (link below), and based upon your equipment selection and your location, we will send links and instructions for you to order your equipment.
Click Here to Order ExpatTV Now!
You can also click the “Order Now!” link in the menu bar to the left of this page.
Make sure you fill out all of the required fields/questions. When you click Submit, you should get an on-screen confirmation message, and then a confirmation email. If you don’t see the email, check your Junk / Spam folder.
Once you have received your equipment, we will send your setup instructions and credentials to access our servers as well as the invoice for the first month of service.
For BYOD (Bring Your Own Device) accounts (iOS, Android, Windows, etc.), since you already have your device/equipment, we will send your setup instructions and credentials to access our servers as well as the invoice for the first month of service.
How do I install my ExpatTV?
Self-Installation
We will provide you with links and information to purchase the equipment in your country, and you prepare it for use. Installation consists of connecting the ExpatTV equipment to your TV using the included HDMI cable, and then connecting it to your Internet using wifi, just as you would a phone or other device. Or, if practical, you can also connect the ExpatTV system to your Internet using an ethernet cable. Optimal performance is achieved using an ethernet cable or a mesh wifi system. Self-Installation will get you up and running with ExpatTV as quickly as possible! We provide step-by-step instructions, support, and a Quick Start Guide.
On-Site Technician Install
We no longer offer on-site technician installations.
Which Internet service providers (ISPs) work best with ExpatTV?
We do not recommend or endorse any ISP, and your mileage with a particular provider may vary. Generally speaking, fiber optic Internet providers work well with ExpatTV. Our clients have reported good performance and successful viewing in México with:
Telmex (fiber optic)
TotalPlay
Abix
Digitcenter
Izzi (fiber optic)
Izzi / Wiz / Cablemas using the older coax technology is a decent option, but they have more outages and service problems than do the fiber optic providers. We have hundreds of clients using Izzi with only occasional problems.
For clients in the U.S., Canada, and other countries outside of México, we have experienced good result with all Internet providers that our clients have tried with the exception of wireless (radio/microwave) providers in very remote areas of the U.S., Canada, and Europe.
We recommend “wired” Internet service over wireless (radio or microwave) providers. Wireless technology is constantly improving, but there can be a great deal of variation that can cause frustration. Also, many wireless providers are small and independent and often do not have adequate capacity to service all of their clients during peak times of the day – particularly evenings on weekdays and afternoons and evenings on weekends. However, we have quite a few clients using ExpatTV via competent wireless Internet providers that have adequate resources to provide their promised/contracted bandwidth.
We have quite a few clients that have switched to Starlink. Starlink is expensive up-front to purchase the equipment, but then fairly economical on a monthly basis, at least in México. Starlink provides a good option for clients that have no other good options, but it has some variation at times and does not perform well during storms. We also notice more frequent capacity and routing issues with Starlink, presumably due to the rapid growth of their installed client base.
If you have a different provider, feel free to message us for our experience with a particular provider.
What about cellular Internet service from Telcel or AT&T?
We do not recommend use of our ExpatTV service in México via Telcel or AT&T cellular Internet service. The speed is more than we need and both providers are generally very consistent – the problem is the monthly data caps. Streaming live TV consumes one to two gigabytes per hour. So even if you have the largest package from Telcel or AT&T, which is 200 gigabytes per month, you will have 100 to 200 hours per month of streaming before you hit the data cap. When you hit the data cap, they will slow your service down to 1 megabit/second, which is too slow for streaming. To overcome this, you go to Telcel’s or AT&T’s website any pay 100 pesos for another 25 gigabytes.
We have a long-time client in Chuburná, Yucatán that has no other options for Internet and uses Telcel with good success, but they have learned to “ration” their TV viewing so that they don’t hit their limit. For example, during American Football season and during Major League Baseball season, they don’t watch much other TV so that they can watch Football and Baseball.
If you have Telcel or AT&T cellular Internet service and have no better options, you may wish to consider using Starlink or a competent wireless Internet provider. See our comments about Starlink in the “Which Internet service providers (ISPs) work best with ExpatTV?” FAQ.
General Information
How do I get in touch with ExpatTV?
All communication with us, for support, billing, requests, or any other matter, is via our website or via email to:
Sales: sales@expattv.org
Support/Billing/Other: help@expattv.org
General Pre-Sale Info: info@expattv.org
To request that we add channels, movies, TV series, or other content, please use the Requests form on our website – there is a link on the menu at the left side of this page.
You can also visit our website and use our beacon for Support (“We’re here to help!” in the lower right corner), or select the appropriate form for Orders/Sales, Requests, Support, or Info.
We do not make or receive voice calls, video calls, Whatsapp messages, or text messages, ever. And since we don’t accept voice calls, do not leave voice mail – we cannot retrieve it.
Please DO NOT message us via Facebook Messenger. Facebook’s Business Suite is terrible with regard to notifying us of new messages – we may not know that you sent us a message on Facebook for days.
Please DO NOT send us text messages. Our cellular coverage is non-existent where we are based and we will likely not receive your text messages.
How do I update my credit/debit card or bank account information for payments?
If your billing account is set to auto-pay using a payment method saved to your account, you can use a prior month’s payment receipt (email) to update your credit / debit card or bank draft details. The email receipt contains a link that says “Update payment method”. Click on this link and update as needed. If you were not previously set to use auto-pay, then your receipt will not have this link.
Starting in August of 2025, our billing system will send your invoice via email four to seven days prior to the due date. If your account is already set to auto-pay, this email will contain a link to “Update payment method”.
PLEASE NOTE: Our payment processor does not have a portal into which clients can log in to update their payment methods.
Occasionally our payment processor in the U.S. has made changes to their system that impacts your ability to update your payment method. If you try to update and are unsuccessful, and/or you get the message “Sorry. The information you entered was not accepted. Please confirm your card information”, then the payment processor is having an issue. Instead, click on the link that reads “Remove my card” or “Unlink my card” to delete the current card, then wait for your next invoice and use the new card to pay it, and check the box that reads “Save my card on file with ExpatTV”.
How do I pause and restart my ExpatTV service?
If you would like to temporarily pause your ExpatTV service, please visit our website and complete the “Pause / Restart ExpatTV Service” form located at: https://expattv.org/pause-restart/
Your ExpatTV service will be paused at the end of your current pre-paid billing period. We do not prorate partial months.
Then, when you are ready to reactivate your ExpatTV service, just visit the form again and submit your request to restart your ExpatTV service. There is no need to contact us in advance as we cannot schedule your restart in advance. Activation takes place quickly once we receive and process your request. Contact us on the day you want to restart, or one day prior, and your ExpatTV service will be reactivated. Your billing date will be reset to the date that your service is restarted. For example, if you ask us to reactivate your service on June 22, then we will do so, and your billing due date will be reset to the 22nd of each month.
You may pause your ExpatTV service once per calendar year at no cost. This does not carry forward to the next year if it goes unused. Once per year, period. Each additional pause after the first one in a given calendar year will incur an administrative fee of $30.00 USD.
We only have a few clients who turn their service off/on. The vast majority of part-time residents of Mexico get comfortable with their ExpatTV service, and they take their devices back to the U.S., Canada, Europe and elsewhere, around the world!
How do I search for a specific Movie or TV Series?
For Gen2 and Gen2+ systems using MOL2 (MyTVOnline2):
While in the VOD (Movies) or TV Series section of the app:
- Press the Groups button
- Place the cursor on the ALL group
- Scroll right to the movies/TV series, then scroll up and select the magnifying glass
- A keyboard will pop up – type any part of the name of the content that you are looking for – content will filter dynamically as you type each character
- When you see what you are looking for, press the Back button to remove the keyboard, and then select the desired content
For Gen3 systems using MOL3 (MyTVOnline3):
While in the Live TV, VOD (Movies) or TV Series section of the app:
- Press the Groups button
- Select any group EXCEPT Favorites (it doesn’t matter which group you select as searches in MOL3 are global – they search all content across all content types)
- Scroll right to the movies/TV series, then scroll up and select the magnifying glass
- A keyboard will pop up – type any part of the name of the content that you are looking for, then select the magnifying glass at the bottom right of the on-screen keyboard
- Your search results will be displayed.
- By default you will see content from the section of the app that you are currently in (Live TV, VOD, or TV Series). Use the left /right arrows to navigate to other content sections.
- Press the down arrow, then the left/right arrows to select your desired content
- Press the OK button on the remote control to start that content
How do I request new channels, movies, TV series, events, concerts, or other content?
For content requests, please utilize our Requests system on our website at https://ExpatTV.org/requests/
We no longer accept requests via Whatsapp as it became too difficult to manage and too many content requests were falling through the cracks and going unfulfilled.
Most mainstream new movies and TV series will already be in our “Watch” system by the time you see the commercial or read about it. There is no need to request big-budget movies, nor new seasons of TV series that we already carry. If a new season has started and we do not have it after one week, you may request it.
PLEASE do a Refresh (Gen2 /Gen2+/Gen3 only) and then search for content before requesting it!
A large percentage of the requests we receive is for content that we already have. PLEASE do a search first, and make sure your spelling is correct – Google is your friend.
For live TV channels, give us any of the following that is relevant:
- The exact channel name
- The network (CBS, ABC, etc) if it’s a local market channel
- The channel # if it’s a local market channel
- The call letters if it’s a local market channel
For movies and TV series, give us any of the following that is relevant:
- The exact name of the movie or TV series (please make sure that you spell it correctly and that you give us the EXACT name)
- The year that the movie was released or that the TV series first aired
- The leading actors/actresses in the movie or TV series
- The platform / network / streaming service where the movie or TV series originated
1) We make no promises as to when, or if, requested content will be available.
2) Content requests are fulfilled as time permits.
3) Please do not contact us asking for status – it will be available if/when it is ready.
4) Please do not submit duplicate requests.
What do I need to know about traveling with ExpatTV?
Yes! You can take ExpatTV anywhere you travel and have the same channels and on-demand content available, anywhere in the world!
First, one VERY important step to take BEFORE you leave home…
Many hotel and condo wifi systems require a web browser in order to log in, usually providing your name and room number or other identifying information. It is important that you install a web browser while you are connected to your own Internet/wifi, BEFORE you leave, or you can create a Catch-22 where you cannot connect to wifi because you don’t have a web browser, and you can’t download a web browser because you don’t have wifi. Use the Market app or the Google Play app on your system’s home screen or in the Locker on the home screen to install a web browser. We recommend Chrome.
Then, when at the hotel or condo, the host’s wifi login should spawn a browser window so that you can finish logging in.
If the wifi system to which you are trying to connect does not automatically open a browser window, you will need technical assistance from the hotel’s or the condo’s personnel. We cannot help you troubleshoot a wifi system that we know nothing about.
If you find yourself on the road and without the needed browser, you can set up a mobile hotspot using your cellular phone, attach the ExpatTV system to your phone’s hotspot via wifi, and use the hotspot’s Internet access long enough to download a web browser.
Second, BE SURE THAT YOU TAKE THE REMOTE CONTROL!
Safe and adventurous travels!
How should I connect my ExpatTV system to my TV so that the HDMI and other cables are not visible?
One option is to mount the ExpatTV system to the bottom or to the back of the TV. We often use double-sided Gorilla Tape. Your mileage may vary and we make no guaranty regarding your outcome. You should be careful not to damage the ExpatTV system nor your TV.
If the TV is too thin to securely mount the ExpatTV system, or too close to the wall to accommodate the HDMI cable in the rear of the ExpatTV system, you can mount the ExpatTV system to the back of the TV, either facing downward or to the side. Leave about one inch / 2.5 centimeters of the ExpatTV system protruding below/to the side of the TV, with the status light pointing down or to the side. The remote control is infrared, so you need a line-of-sight between the remote control and the ExpatTV system for proper control. Test the remote control BEFORE you mount the ExpatTV system permanently – Gorilla Tape is VERY difficult to remove once it is secured.
How do I use Subtitles and Closed Captioning (CC)?
For Gen1 devices:
A fair amount of our on-demand content has English subtitles. If you have a Gen1 device, English subtitles will appear automatically if they are available. If you wish to turn off subtitles on a Gen1 system, press the APP button (left column, fourth button from the top) and then select Subtitles and set to OFF. Gen1 devices do not support Closed Captioning on live TV channels.
For Gen2/Gen2+/Gen3 devices:
Subtitles in VOD/TV Series:
- Press Ok while watching
- Scroll down to the bottom row
- Scroll left and select Subtitle.
- It will list what is available. Select English if it is listed.
If you want subtitles to appear by default if the content includes subtitles:
- Press Menu
- Scroll down and select Settings
- Scroll down and select Subtitle Language
- Select English
There is also an Online Subtitle feature detailed below that will allow you to search for subtitles for content that does not have them.
Closed Captions in Live TV:
Some of our mainstream live TV channels have Closed Captioning. You will know because in the first five seconds after you go full-screen with on particular channel, it will show the name of the channel, and then to the right there will be one or more squares with “HD”, or “FHD”, or “CC” inside the box. If there is a CC, then the channel has closed captions.
To activate Closed Captioning:
- Press Ok twice
- Press the down arrow for Actions
- Scroll left and select Settings
- Scroll down and select Subtitle
- Select Closed Caption
- Press the Back button to exit
Online Subtitles:
To setup Online Subtitles:
- Within MyTVOnline2, press Menu
- Select Settings
- Select Player Options
- Select Online Subtitles
- Select Sign-up to create an account with OpenSubtitles.com – enter your desired User ID, your email address, and desired password.
- You will receive a confirmation email – confirm the new account.
- OpenSubtitles.com no longer provides their complete service for free – there is a daily limit to the quantity of subtitles that you can download. To overcome this limitation, go to OpenSubtitles.com using a web browser, log in using the account you just created, and upgrade to VIP for $20 USD per year. The developer of our apps has plans to incorporate another service that will provide online subtitles free of charge, but there is no timeline for when this will be implemented.
- Back on your ExpatTV system, select Sign-in and log in using your User ID and password that you just created.
- Select Preferred Languages and use the entries in the far-right column to de-select any languages that you do not need.
- When finished, scroll to the left and select Complete.
To use Online Subtitles:
- When watching a movie, press OK
- Scroll down to the bottom row
- Scroll left and select Subtitle.
- Select Online Subtitles
- Select your desired language
- In the Search Text field, it will place the title of the movie as it appears in our system. It’s best to use ONLY the movie’s title and the year it was released. Remove the parenthesis, leaving just the movie’s title and numeric year. Delete all other text, including the “New”, “720p”, “1080p” etc.
- Select the Return key or the Check Mark key on the on-screen keyboard
- Select OK to search
- It will list the subtitle choice that it finds…select one
- If the subtitles that appear are out of sync with the movie’s audio, repeat the same procedure and select a different option after searching.
- When prompted “Overwrite existing subtitle file?” select OK.
How do I tell which system I have – Gen1, Gen2, or Gen3?
Our Gen1 systems are manufactured by Infomir in Ukraine. Some models have a logo “MAG” in large letters on the top of the device…
This is a Gen1 system:

Other models have a red circle on the top of the device…
This is also a Gen1 system:

If you do not have one of the two above devices, then you have a Gen2 or Gen3 system.
The following are common Gen2 devices, all manufactured by Formuler in South Korea: Z8, Z8 Pro, Z+ Neo, GTV, Z10, Z10SE, Z10 Neo, Z10 Pro, Z10 Pro Max. Any member of the Z8 and Z10 families are usable as a Gen2 device
Gen3 systems are members of the Z11 family, including Z11 Pro, Z11 Pro Max, and Z Mini.
How do I do a manual Refresh on my Gen3 device running MyTVOnline3 (MOL3)?
MyTVOnline3 (MOL3) Manual Refresh:
1) Press Menu
2) Select Content Manager
3) Select Data Sync
4) Select Contents Data
5) Select Refresh
6) It will say “Refresh Start” at the bottom center of the screen, then after 10-15 seconds it will say “New content has arrived” in the lower right corner
7) Press Back three times to return to live TV
8) Press Menu
9) Select “Refresh Contents” at the top of the menu – this menu item only appears when there is new content available to be imported
You can also schedule a daily Refresh under Data Sync –> Auto Update Settings. It defaults to 5:00am. 13:00pm or later would be better as we update a lot of content in the morning hours, Eastern Standard Time.
How do I delete recordings (Gen2+/Gen3)
For systems using the MyTVOnline2 (MOL2) app:
- Press the Menu button
- Select Recordings
- Use the up/down arrows to select the recording date from which you wish to delete.
- Scroll to the right where the recordings are listed
- Long-press (press and hold) the OK button
- A check box will appear in the upper right corner of each recording
- Check the recording(s) that you wish to delete
- You may also scroll to the bottom of the screen and select “Select All” or press the Red button to select all recordings for that recording date
- Scroll to the bottom of the screen and select “Delete” or press the Green button to delete the selected recordings
- Select OK to confirm
- If you deleted all of your recordings, you will get a message that appears to be an error message – it is not an error – it is simply saying that you don’t have any recordings. Just select OK.
For systems using the MyTVOnline3 (MOL3) app:
- Press the Menu button
- Select Recordings
- Scroll to the right where the recordings are listed
- Long-press (press and hold) the OK button
- A check box will appear in the upper right corner of each recording
- Check the recording(s) that you wish to delete
- You may also press the Red button to select all recordings
- Press the Green button to delete the selected recordings and confirm
- Select OK to confirm
- If you deleted all of your recordings, you will get a message that appears to be an error message – it is not an error – it is simply saying that you don’t have any recordings. Just select OK.
How do I clear notifications (MOL3)?
- Within MyTVOnline3, press the Menu button
- Select Notifications
- Press the Red button on the ExpatTV remote control to “Mark all notifications as read”
Troubleshooting
My ExpatTV system/service is not working. What should I do?
If your ExpatTV system or service is not working correctly, the first thing you should do is to restart/reboot it. The steps are very different between Gen1 and Gen2/Gen2+/Gen3 systems.
Click Here if you’re not sure which system you have.
Gen1 Restart Instructions:
To restart/reboot a Gen1 system, simply unplug the power cord from the back of the ExpatTV device and then plug it back in. The system will reboot and then take you back into the ExpatTV portal.
Gen2/Gen2+/Gen3 Restart Instructions:
Try to avoid unplugging the power from your ExpatTV Gen2/Gen2+/Gen3 system. It has local storage/memory than can become corrupted. You should only unplug the power if you have a black screen or a “No Signal” message and you are sure that you have selected the correct HDMI port/input/source using the TV’s remote control.
Instead of unplugging the power, do a Restart:
- Press and hold the STB button (top-right or top-center button on the remote control)
- Select Restart when the menu pops up. The system will restart and take you back into ExpatTV.
My TV has the message “No Signal” or “Is it on?”, or it has only a blank screen
First, using the TV’s remote control, make sure that you have selected the appropriate HDMI port / input / source to which the ExpatTV system is connected.
If you are sure that you have selected the correct HDMI, and the ExpatTV system is turned on (white light on the front) and you still do not have an image on the TV screen, then unplug and replug the power to the ExpatTV system. You should then see an image on the TV screen.
If you still don’t have an image on your screen and/or you see “No Signal” or “Is it on?”, there may be an HDMI issue. Do these steps in order:
1) Unplug and replug both ends of the HDMI cable
2) Try a different HDMI port on the TV
3) Try a different HDMI cable
4) Try a different TV
The time is incorrect on my ExpatTV system. How do I fix it?
You ExpatTV system sets its date/time from your Internet service based upon the time zone that is selected. To select your time zone:
Gen2, Gen2+, and Gen3 systems:
- Press the Home button to go to the home screen
- Scroll down (or up and to the right for some systems) and select the “gear” icon for Settings
- Some systems will prompt you for a PIN. If asked for a PIN, enter it and then select the Tab or Return key on the on-screen keyboard. If you don’t know your PIN, contact us and we will give the PIN to you. If it does not ask you for a PIN, skip this step.
- Scroll down and select Device Preferences. If your system does not have Device Preferences, you should have an option for “Date & Time” – select this instead.
- Select Date & Time
- Scroll down and select Set Time Zone
- Select the appropriate time zone and press OK.
- For clients in the state of Quintana Roo, México, select Bogota, Colombia (GMT -5:00). Colombia always uses Eastern Standard Time and does not observe Daylight Savings Time.
- For clients in the state of Yucatán, México, select Costa Rica (GMT -6:00). Costa Rica always uses Central Standard Time and does not observe Daylight Savings Time.
- For clients on the Pacific side of Mexico, select Chihuahua (GMT -7:00).
- For clients in the U.S, Canada, Europe, Asia, and elsewhere, select the appropriate time zone for your location.
- Press the Home button
- Do a Restart by pressing and holding the STB/Power button (top right button on the remote control) and then select Restart when the menu pops up. Your on-screen time in the Guide should now be correct!
I am getting “Error! Please check your internet connection, Portal URL, User ID, and Password – Code 7” when launching MyTVOnline2 – What should I do?
“Error – Please check your internet connection, Portal URL, User ID, and Password – Code 7”
If you are receiving Error 7 when launching ExpatTV, below are the most likely causes:
A) Your ExpatTV system is not connected to your Internet service/Wifi
If you are connecting your ExpatTV system to your Internet router via wifi, double-check that it is connected.
- Press the Home (house) button to go to the Home screen
- Scroll to the bottom of the screen and select the Network Settings app (second from the left with the wifi symbol or a <…> symbol)
- If prompted for a PIN, enter your PIN
- Select your wifi access point name, and enter your password (just like you would with your phone or tablet)
- Once connected to your wifi, press the Home button, scroll to the top of the screen and launch the MyTVOnline2 app.
Also, if while the message is “Connecting to ExpatTV #1 & Video Club”, you see “Waiting for network connection (x/3)” along the top right of the screen, either your system is not connected to your Internet service, or your Internet service is down or otherwise has a problem. Use the steps above to verify your Internet connection.
If you are connecting your ExpatTV system to your Internet router via ethernet cable, double-check that both ends of the ethernet cable are securely connected and that the cable is not damaged.
B) Your access credentials (User ID and Password) are incorrect
If you are accessing ExpatTV for the first time, or you have performed a factory reset of your system, or you have changed your User ID and/or Password, they may be incorrect:
- At the error message, select OK
- Select ExpatTV #1 & Video Club
- Select Edit
- Verify that the User ID is correct. In most cases, there is an underscore (“_”) between your names. There are never spaces in the User ID.
- Scroll down to the Password field, then scroll right and select the eyeball icon to expose the Password
- Verify that the Password is correct
- If you made any changes/corrections, scroll down and select Connect
C) Your ExpatTV service is inactive due to non-payment
Verify that your account is paid. We see this frequently when a credit or debit card is expired or cancelled, or an automatic payment transaction is declined. Your ExpatTV service is subject to disconnection at any time after the due date of the invoice. If our requests for payment are going to your Junk / Spam folder, mark them as “not junk” and add messenger@messaging.squareup.com to your email contacts to insure deliverability of our emails.
D) Something is blocking your access to ExpatTV
If you have recently changed to a different Internet provider (ISP), or a different Internet router, or a new mesh wifi system or other wifi equipment, or implemented any security hardware or software, one of these may be blocking your access to our servers. For example, Netgear Orbi mesh wifi systems include Netgear’s Armor software, which blocks URLs that it does not trust. Disable Netgear Armor or whitelist our URLs.
If you have done everything listed in this post and still get the error, contact us via the Support link at the left of this page and we will try to help you troubleshoot.
I am getting “Connect failed – Please check your internet connection and portal URL – Code: 1010” when launching MyTVOnline3 – What should I do?
“Connect failed – Please check your internet connection and portal URL – Code: 1010”
If you are receiving error Code 1010 when launching ExpatTV, below are the most likely causes:
A) Your ExpatTV system is not connected to your Internet service/Wifi
If you are connecting your ExpatTV system to your Internet router via wifi, double-check that it is connected.
- press the Home (house) button on the remote control to go to the Home screen
- scroll to the top of the screen, then to the right and place the cursor on the “gear” icon for Settings.
- scroll down once and right once to the network settings app (with the wifi symbol or a <…> symbol) and press the OK button on the remote control.
- if prompted for a PIN, enter your PIN
- select your wifi access point name, and enter your password (just like you would with your phone or tablet)
- once connected to your wifi, press the Home button, scroll to the left and down and launch the MyTVOnline3 app.
If you are connecting your ExpatTV system to your Internet router via ethernet cable, double-check that both ends of the ethernet cable are securely connected and that the cable is not damaged.
B) Your access credentials (User ID and Password) are incorrect
If you are accessing ExpatTV for the first time, or you have performed a factory reset of your system, or you have changed your User ID and/or Password, they may be incorrect:
- at the error message, select OK
- select ExpatTV #1 & Video Club
- scroll right to the “pencil” icon for Edit and press the OK button
- verify that the User ID is correct. In most cases, there is an underscore (“_”) between your names. There are never spaces in the User ID.
- scroll down to the Password field, then scroll right and select the eyeball icon to expose the Password
- verify that the Password is correct
- if you made any changes/corrections, scroll down and select Connect or Update
C) Your ExpatTV service is inactive due to non-payment
Verify that your account is paid. We see this frequently when a credit or debit card is expired or cancelled due to fraud, or an automatic payment transaction is declined. Your ExpatTV service is subject to disconnection at any time after the due date of the invoice. If our requests for payment are going to your Junk / Spam folder, mark them as “not junk” and add messenger@messaging.squareup.com to your email contacts to insure deliverability of our emails.
D) Something is blocking your access to ExpatTV
If you have recently changed to a different Internet provider (ISP), or a different Internet router, or a new mesh wifi system or other wifi equipment, or implemented any security hardware or software, one of these may be blocking your access to our servers. For example, Netgear Orbi mesh wifi systems include Netgear’s Armor software, which blocks URLs that it does not trust. Disable Netgear Armor or whitelist our URLs.
If you have done everything listed in this post and still get the error, contact us via the Support link at the left of this page and we will try to help you troubleshoot.
The TV Guide (EPG) information is not accurate. How do I fix this? (MOL2)
For Gen2 and Gen2+ systems with MyTVOnline2:
If your EPG (TV Guide) information is not correct, first verify that the date and time listed in the upper-right corner of the Guide is correct.
If not, first do a Restart – Press and hold the STB/Power button (top right button on the remote control) and then select Restart when the menu pops up.
If the date/time is now correct, check to see if your EPG data is now correct. If your EPG data is still not accurate, proceed with the steps below to clear and reload your EPG data.
If the date/time is NOT correct, verify that your time zone is set correctly. Click here for instructions for checking/changing your time zone.
If your time IS correct, you should clear your EPG data and allow it to re-populate:
- Exit the Guide
- Press the Menu button
- Scroll down and select Settings
- Scroll down and select Clear EPG Data and confirm
- Press Menu and select Live TV
It will take several minutes to populate the guide, and programs that have already started will say “No information”, but future shows should be populated with EPG information.
The TV Guide (EPG) information is not accurate. How do I fix this? (MOL3)
For Gen3 systems with MyTVOnline3:
If your EPG (TV Guide) information is not correct, first verify that the date and time listed in the upper-right corner of the Guide is correct.
If not, first do a Restart – Press and hold the STB/Power button (top right button on the remote control) and then select Restart when the menu pops up.
If the date/time is now correct, check to see if your EPG data is now correct. If your EPG data is still not accurate, proceed with the steps below to clear and reload your EPG data.
If the date/time is NOT correct, verify that your time zone is set correctly. Click here for instructions for checking/changing your time zone.
If your time IS correct, you should clear your EPG data and allow it to re-populate:
- Exit the Guide
- Press the Menu button
- Select Content Manager
- Select Data Sync
- Select EPG Data
- Select Clear and Update EPG and confirm
It will take several minutes to populate the guide, and programs that have already started will say “No information”, but future shows should be populated.
There was a bug in a version of MyTVOnline3 that caused your EPG (guide) information to disappear after using our Rewind! capabilities. Make sure that your ExpatTV system is updated to the newest version of the app to prevent this problem. Instructions for installing software updates are here:
How do I fix problems with no audio or the audio and video being out of sync?
If you are seeing a channel with no audio, or audio/video out of sync – meaning that the sound does not match the picture, or the voices do not match up with the mouths that are speaking – this is an issue with individual channels. There are two options:
Less mainstream channels are “on-demand” streams that do not start until someone is watching them. You may be able to restart these yourself by just switching to a different channel for at least 90-120 seconds and then switching back to the original channel. This is because the less popular channels start and stop on-demand, so by switching away, the stream will eventually stop, and then by switching back it will restart. As an example, many channels in the Locals / Regionals group (local network channels from various U.S. cities) are on-demand channels. This method will only work if you are the only client currently watching that specific channel. If someone else is also watching the same channel (obviously you have no way of knowing this), then when you switch to a different channel, the stream will not stop and therefore will not restart.
If switching to a different channel and then coming back after a delay of 90-120 seconds does not work, we will need to restart the channel. If the above procedure does not correct the problem, use the following form to report the EXACT and FULL CHANNEL NAME…
https://expattv.org/support/report-a-content-problem/
DO NOT send us a channel number as channel numbers vary for different clients.
A/V sync issues are channel-specific. Restarts and Refreshes on the client’s side generally do not help.
Some of my channels have a lock symbol and ask for a PIN. Help!
(Gen2 / Gen2+ / Gen3 systems only)
It’s easy to accidentally lock a channel because the lock is right next to Favorite on the Actions menu.
The default PIN is 0000 (four zeros).
Once you temporarily unlock the channel, to remove the lock:
- press OK twice
- press the down arrow for Actions
- scroll right and select the lock
- enter the PIN (0000) again, and it will unlock
How do I install software updates?
There are periodic software updates released for our Gen2, Gen2+, and Gen3 devices. These are released to fix bugs and other problems and to improve the overall stability and usability of the system. To install updates:
For Gen2 and Gen2+ systems:
- Press the Home button (house icon) on the ExpatTV remote control to go to the home screen.
- If you see “Software Update” under the Quick Settings section of the home screen, select it
- If you do not see the Quick Settings section, do the following:
a) Scroll to the bottom of the home screen and select “Launcher Settings”.
b) When prompted, enter your system’s PIN. If you do not know the PIN, contact us and we will provide it.
c) Select Parental Settings.
d) Enter your PIN again
e) Select Show Quick Settings to move the slider from left to right – it will turn blue.
f) Press the Home button to return to the home screen. You will now have a Quick Settings section. Select the Software Update app. - The system will check for updates and list any that are available. If there are updates available, in the blue box on the left side of the screen it will say “Start Update”. Press the OK button.
- The available updates will install, and then the system will restart.
- When the system comes back up, go to the home screen again and repeat the same process, and after check for updates, it should say “Current Version is Latest” in a grey box on the left side of the screen. If not, the box will be blue – press OK to install additional updates.
For Gen3 systems:
- Press the Home button (house icon) on the ExpatTV remote control to go to the home screen.
- Scroll up, then right to the “gear” icon for Settings
- Scroll down and select Software Update
- The system will check for updates and list any that are available. If there are updates available, in the blue box on the left side of the screen it will say “Start Update”. Press the OK button.
- The available updates will install, and then the system will restart.
- When the system comes back up, go to the home screen again and repeat the same process, and after check for updates, it should say “Current Version is Latest” in a grey box on the left side of the screen. If not, the box will be blue – press OK to install additional updates.
How do I move my ExpatTV system to another location or to a different TV?
The process of disconnecting and reconnecting your ExpatTV system is very simple:
If you are moving your ExpatTV system because you are traveling and/or staying in a hotel or condo, review the following post for important travel information: Traveling with ExpatTV
To disconnect:
- Gen2/Gen2+/Gen3 users need to properly shut down your ExpatTV system by pressing and holding the STB button (top right button on the remote control) and then select “Power Off” when the menu pops up. Gen1 systems do not need this step.
- Disconnect the HDMI cable from the TV.
- Unplug the power adapter from the electrical outlet.
- If applicable, unplug the ethernet cable from your switch/router.
- Take all cables and components with you. MAKE SURE YOU TAKE THE REMOTE CONTROL!
To reconnect:
- Connect the HDMI cable from the ExpatTV system to the new TV. Note which HDMI port you connected it to (HDMI 1, HDMI 2, etc).
- Turn on the TV and use the TV’s remote control to select the HDMI port / source / input to which you connected the HDMI cable.
- If applicable, connect the ethernet cable from your ExpatTV system to your switch or router. If you are using Wifi to connect your ExpatTV system to your Internet service, this step does not apply to you.
- Plug the power adapter for the ExpatTV system into an electrical outlet. The system will start up. Any time the system loses power, either due to a power outage or due to it being unplugged from electricity, when it comes up, it will start a Shutdown Countdown for 10 seconds. Press the OK button or the Back button on the ExpatTV remote control to cancel this countdown.
- In most cases, the MyTVOnline application will launch automatically. If you are using an ethernet cable, your TV programming should start. If MyTVOnline does not start, select the MyTVOnline app in the top row of the home screen.
- If you are NOT using an ethernet cable, you will need to connect the ExpatTV system to your Internet service via Wifi…
- Press the Home button on the ExpatTV remote control to return to the home screen.
- Scroll to the bottom row of the screen and select the Network Settings app (second from the left with the Wifi symbol or a <…> symbol).
- After a few moments, it will populate with a list of the Wifi access points that it sees.
- Select your Wifi access point name and enter your Wifi password.
- Once it says “Connected”, scroll to the top row of the screen and launch the MyTVOnline app.
You should be in!
With one exception, you do not need to notify us of your move. You will automatically be connected to the appropriate datacenter based upon your new geographic location. The exception is if you are moving from México to another country. We often use manual DC (datacenter) mappings to insure the best performance with various Mexican ISPs. When you return to the U.S., Canada, or elsewhere, you may see performance problems due to the static mappings to our various datacenters. If you see performance problems after leaving México, contact our Support team via our website and explain your situation and ask them to remove any static mappings.
I am seeing stuttering / buffering on my ExpatTV but I can watch Netflix with no problem?
Comparisons between ExpatTV and Netflix are completely irrelevant for two primary reasons:
- Netflix is NOT Live TV. Netflix is static content that has been pre-processed to be able to adjust to fluctuating Internet conditions. This is not possible with 1500+ channels of live TV, which therefore consumes more bandwidth and is more sensitive to Internet fluctuations. ExpatTV needs 5x to 10x the amount of consistent bandwidth that Netflix needs. Therefore, Netflix can operate satisfactorily when you are “bandwidth challenged” due to outages, re-routes, and/or congestion.
- Netflix has servers very close to you. Netflix has servers on the private networks of most major ISPs, including Telmex, Izzi, MegaCable, and TotalPlay here in México. That means that your Internet traffic between you and Netflix only has to travel short geographic distances and never leaves your ISP’s private network, so it is not subject to congestion, outages, and re-routes along the Internet backbone as is the case when you are communicating with ExpatTV’s servers in the U.S.
I am seeing stuttering / buffering on my ExpatTV but my Speedtest is good?
Your Speedtest is (almost) completely irrelevant in the context of ExpatTV. Your Speedtest only measures the speed between you and your ISP, which is usually located geographically very close to you and never has to traverse any external networks – all communication is within the private network of your ISP and therefore is not subject to the slings and arrows of the Internet.
The speed that matters is between you and ExpatTV’s servers in México and the U.S. Because ExpatTV has to traverse external networks and traffic is carried by multiple providers, ExpatTV traffic is more likely to be negatively impacted by Internet backbone outages, re-routes, and congestion.
Troubleshooting Communication Problems / Stuttering / Buffering / Freezing / Repeating
If you are experiencing trouble with communication problems, stuttering, buffering, freezing, or repeating while viewing Live TV and/or VOD, the problem is (almost) always on your (the client’s) side. It is very rare that a server-side issue causes these issues.
Try these steps in this order:
A) Run a speedtest. On another device (cell phone, tablet, laptop, etc), use speedtest.net or fast.com in a web browser, or download and run the Ookla Speedtest app. If the reported speeds are not in line with what your Internet service should be providing, proceed with step B) below to reboot your Internet equipment. Also, if your Internet provider is Telmex/Infinitum, verify that you do not have a past-due payment with Telmex. If you account is past due, Telmex will slow your speeds down to download speeds of 1-3 Mbps, making streaming impossible.
B) Restart your devices:
- Reboot your Internet router by unplugging/replugging the power. If your Internet service is from Starlink, unplug the power for at least 10 minutes before reconnecting it. This will allow the Starlink dish to completely power down and then reboot when you reconnect the power.
- Once your Internet service is back up, restart any auxillary network devices, such as mesh wifi modules.
- If you have PowerLine modules installed, restart them. PowerLine modules are small white modules plugged into an electrical outlet near your Internet router and near your TV(s). There will be an ethernet cable running from the PowerLine module to your Internet router and to your ExpatTV system(s). Unplug each of these PowerLine modules from the wall, and then replug them. Make sure that they are plugged directly into the wall and that they weren’t accidentally moved to a power strip, voltage regulator, UPS, etc.
- Once all of your devices are back online, restart your ExpatTV system:
a) If you have a Gen1 system, you restart your ExpatTV system by unplugging and replugging the power, causing it to reboot.
b) If you have a Gen2/Gen2+/Gen3 system, you restart by pressing and holding the STB/Power button (top right button on the remote control) and then select Restart when the menu pops up. Try to avoid unplugging the power from Gen2/Gen2+/Gen3 devices. The proper method to reboot is step b) above, not unplugging the power. You should only unplug the power if the light on the front of the ExpatTV system is white (it’s turned on), but you do not have an image on your TV screen, so you therefore cannot see the menu to do a Restart.
C) For Gen2/Gen2+/Gen3 devices, clear the app cache:
- Press the Home button to go to the Home screen.
- From the Home screen, scroll down and select Settings (gear icon). On some systems, the gear icon for Settings is at the top right of the screen – in this case, scroll up, then right to Settings.
- It may prompt for a PIN – enter your PIN and then select the Enter/Tab button on the on-screen keyboard. If you don’t know your PIN, contact us and we will give it to you.
- Scroll down and select Apps.
- Scroll down and select MyTVOnline2 or MyTVOnline3.
- If you have a “Force Close” or “Force Stop” option, select it and confirm. If not, skip this step.
- Scroll down and select Clear Cache and confirm.
- Press the Home button.
- Press and hold the STB/Power button (top right on the remote) until a menu appears, and then select Restart
D) If you are using wifi to connect your ExpatTV system to your Internet service, try to eliminate the wifi variable by (temporarily) connecting your ExpatTV system to your Internet router using an ethernet cable. If the ethernet cable provides better performance, you should consider upgrading your wifi system. In many cases, we recommend a mesh wifi system to improve your wifi coverage and consistency.
E) You may wish to try installing a VPN on your ExpatTV system. If the problem is either congestion, saturation, or routing issues between your ISP and our datacenters, by selecting different servers (cities) for the VPN, you may be able to change your route to the DC, bypassing the issue. It is also possible that your ISP is blocking, throttling, or otherwise interfering with your traffic. A VPN would effectively “hide” your traffic from the ISP’s games. All Formuler systems come with a free trial of ExpressVPN, which you can install from the Market app or from the Google Play Store.
Clear Cache
For Gen2 / Gen2+ / Gen3 devices, clear the app cache:
- Press the Home button to go to the Home screen.
- From the Home screen, scroll down and select Settings (gear icon). On some systems, the gear icon for Settings is at the top right of the screen – in this case, scroll up, then right to Settings.
- It may prompt for a PIN – enter your PIN and then select the Enter/Tab button on the on-screen keyboard. If you don’t know your PIN, contact us and we will give it to you.
- Scroll down and select Apps.
- Scroll down and select MyTVOnline2 or MyTVOnline3.
- If you have a “Force Close” or “Force Stop” option, select it and confirm. If not, skip this step.
- Scroll down and select Clear Cache and confirm.
- Press the Home button.
- Press and hold the STB/Power button (top right on the remote) until a menu appears, and then select Restart
My ExpatTV repeatedly shows the error message “MyTVOnline2 keeps stopping”…Help!
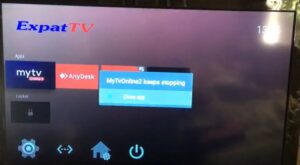
We see this message from time to time on older Gen2 ExpatTV systems. It is usually due to the storage space of the device being full. Do the following steps to free up storage:
- Press the Home button to go to the Home screen.
- Scroll down (or up and to the right for some systems) and select the “gear” icon for Settings
- Some systems will prompt you for a PIN. If asked for a PIN, enter it and then select the Tab or Return key on the on-screen keyboard. If you don’t know your PIN, contact us and we will give you your PIN. If it does not ask you for a PIN, skip this step.
- Select Apps
- Select “See all apps” to expand the list or apps
- If you see ExpressVPN and/or YouTube in the apps, select each and then select Uninstall and confirm to remove these apps and free up the storage they are using.
- Continue scrolling down. If you have the option “Show system apps”, select it.
- Scroll down and select Google Play Services
- Select Clear Data and confirm
- It will bring up another page. Scroll down and select “CLEAR ALL DATA” and confirm by selecting “DELETE” or “OK”
- Select “Uninstall updates” and confirm
- Press the Back button to return to the list of apps
- Scroll down and select Google Play Store
- Select Clear Data and confirm
- Select “Uninstall updates” and confirm
- Restart your ExpatTV system by pressing and holding the STB button and then selecting Restart when the menu pops up
I’m having trouble recording using my Gen2+/Gen3/MOL3 system. Help!
Recording problems are usually due to an issue with the USB memory to which recordings are written.
Unplug the USB chip, do a Restart of the ExpatTV system, then plug it back in.
If that doesn’t work, you can either use a Windows PC to reformat the USB chip using NTFS file system, or follow the steps below to reformat it using the ExpatTV system:
The steps are different for Gen2+ and Gen3 devices…
Reformat USB chip on Gen2+ systems – Z10 Pro/Z10 Pro Max with MyTVOnline2 (MOL2):
- Press Home to go to the home screen
- Scroll down and select the gear icon for Settings
- Select Device Preferences
- Select Storage
- Select USB drive
- Select “Erase & format as removable storage”
- Select Format
Go back to MyTVOnline2 and try to record something. It may prompt you to select your USB device – just accept the default.
Reformat USB chip on Gen3 systems – Z11 Pro Max with MyTVOnline3 (MOL3):
- Press Home to go to the home screen
- Scroll up, then to the right and select the gear icon for Settings
- Select Device Preferences
- Select Storage
- Select USB drive
- Select “Erase & format as removable storage”
- Select Format
Go back to MyTVOnline3 and try to record something. It may prompt you to select your USB device – just accept the default.
Next, check your DVR Settings:
- Within MyTVOnline2/3 (MOL2/MOL3), press the Menu button
- Select Settings
- Select DVR Options
- Make sure the slider for Timeshift is to the right and blue to enable Timeshifting
- Select Recording Storage Location and select the USB Device
- Select Timeshift Storage Location and select the USB Device
- Press the Back button twice to return to Live TV
How do I perform a factory reset of my Z10 – Z10 Neo – Z10SE – Z10 Pro – Z10 Pro Max system?
Z10 – Z10 Neo – Z10SE – Z10 Pro – Z10 Pro Max factory reset:
(revised 2023-07-07)
A factory reset will erase your favorites, your history, and your progress data for series/episodes and movies, and all other data, so if you wish to retain your favorites and progress, you should take photos or make a list.
Before doing the factory reset, make a note of the system’s credentials:
1) Within the MyTVOnline2 app, press the Menu button on the remote control.
2) select Connections
3) select ExpatTV #1 & Video Club
4) select Disconnect
5) select ExpatTV #1 & Video Club
6) select Edit
7) scroll down to the Password field, then right and select the eyeball icon to expose the password
8) take a photo or make a note of the User ID and Password
9) press the back button three times to exit the menus.
Next, perform the factory reset:
1) Press Home to go to the Home screen
2) Scroll down and select Settings
3) If prompted for a PIN, enter your PIN. The default PIN is 0000.
4) Select Device Preferences
5) Scroll all the way to the bottom and select Factory Reset
6) Enter your PIN again
7) Select Factory Reset
8) Select Erase Everything
The system will restart and then start the initial setup process…
1) Go through initial setup:
a) Select Language
b) Select wifi or wired (ethernet) as is appropriate. If using wired (ethernet), select Skip on “Select your Wi-Fi network”. If you select wired (ethernet), select the Automatic (DHCP) option. If using wifi, select Skip on “Setup wired network”.
c) select your Region
d) 24-hour Format = No
e) Date Format = select default
f) It will say “Setup completed!” – press Ok on Complete
2) When setup is complete, it will check for updates and then list the available updates. Select “Start Upgrade” to Install the updates. It will restart after updates are done. If it does not automatically check for updates, select Software Update on the Home screen and install any updates that are listed. If updates are installed, the device will restart.
3) Select the MyTVOnline2 app
4) Select “ExpatTV #1 & Video Club”
5) Enter your User ID
6) Enter your Password
7) Scroll down and select Connect
You should be in!
How do I perform a factory reset of my Z11 Pro – Z11 Pro Max system?
Z11 Pro – Z11 Pro Max Factory Reset
(revised 08/29/2024)
A factory reset will erase your favorites, your history, and your progress data for series/episodes and movies, and all other data, so if you wish to retain your favorites and progress, you should take photos or make a list.
Before doing the factory reset, make a note of the system’s credentials:
1) Within the MyTVOnline3 app, press the Menu button on the remote control.
2) select Content Manager
3) select Content Sources
4) select ExpatTV #1 & Video Club
5) scroll right and select the “eyeball” icon to show hidden info
6) take a photo or make a note of the User ID and Password
7) press the back button three times to exit the menus.
Next, perform the factory reset:
1) press the Home button on the remote control to go to the Home screen
2) scroll to the bottom of the Home screen and select the gear icon for Settings. Some systems will have a newer Launcher app, so you may instead have to scroll up, then right to get to the gear icon for Settings.
3) select “Device Preferences”
4) scroll to the bottom of the list and select “Factory reset”
5) enter default pin of 0000 (for zeroes), then select the check mark on the on-screen keyboard
6) select “Factory reset”
7) select “Erase everything”
The system will restart and then start the initial setup process…
1) go through the setup steps, selecting wifi or wired (ethernet) as is appropriate. If using wired (ethernet), select Skip on “Select your Wi-Fi network”. If using wifi, select Skip on “Setup wired network”. If you select wired (ethernet), select the Automatic (DHCP) option.
2) when setup is complete, it will check for updates and then list the available updates. Select “Start Upgrade” to install the updates. If it does not automatically check for updates, select Software Update in the Quick Settings section on the Home screen and install any updates that are listed. It will restart after the updates are done, bringing you to the device’s Home screen.
3) launch the MyTVOnline3 app.
4) select “Accept” to accept the licensing agreement.
5) with the cursor on “ExpatTV #1 & Video Club”, press OK twice.
6) in the “User ID” field enter your User ID.
7) select the Tab key (right arrow with vertical line) in the bottom right corner of the on-screen keyboard.
8) in the “Password” field enter your password.
9) press the Back button on the remote control to remove the on-screen keyboard, scroll to the right and press the Ok button on the eyeball icon to expose the password – double-check that it is correct.
10) scroll down and select OK.
11) it will connect to our servers and give you a summary of channels, movies, and TV series. Select “Next”.
12) select “Start Setup Wizard”.
13) press the left arrow and select “Next Step” three times.
14) select “Skip for now” when prompted to create Pinned Groups.
15) select “Watch Live Channels”.
You should be in!
How do I perform a factory reset of my Z8 – Z8 Pro – Z+ Neo system?
Z8 – Z8 Pro – Z+ Neo factory reset:
(revised 2023-04-29)
A factory reset will erase your favorites, your history, and your progress data for series/episodes and movies, and all other data, so if you wish to retain your favorites and progress, you should take photos or make a list.
Before doing the factory reset, make a note of the system’s credentials:
1) Within the MyTVOnline2 app, press the Menu button on the remote control.
2) select Connections
3) select ExpatTV #1 & Video Club
4) select Disconnect
5) select ExpatTV #1 & Video Club
6) select Edit
7) scroll down to the Password field, then right and select the eyeball icon to expose the password
8) take a photo or make a note of the User ID and Password
9) press the back button three times to exit the menus.
Next, perform the factory reset:
1) press the Home button on the remote control to go to the Home screen
2) scroll down and select Settings
3) if prompted for a PIN, enter your PIN. The default PIN is 0000.
4) select Storage & Reset
5) select Factory Data Reset
6) select Erase Everything
7) if prompted for a PIN, enter your PIN
The system will restart and then start the initial setup process…
1) Go through initial setup:
a) Select Language
b) Select wifi or wired (ethernet) as is appropriate. If using wired (ethernet), select Skip on “Select your Wi-Fi network”. If you select wired (ethernet), select the Automatic (DHCP) option. If using wifi, select Skip on “Setup wired network”.
c) select your Region/Area
d) 24-hour Format = No
e) Date Format = select default
f) It will say “Setup completed!” – press Ok on Complete
2) When setup is complete, it will check for updates and then list the available updates. Select “Start Upgrade” to Install the updates. It will restart after updates are done. If it does not automatically check for updates, select Software Update on the Home screen and install any updates that are listed. If updates are installed, the device will restart.
3) Select the MyTVOnline2 app
4) Select “ExpatTV #1 & Video Club”
5) Enter your User ID
6) Enter your Password
7) Scroll down and select Connect
You should be in!
My Gen1 device is stuck at “Loading…” Help!
Go through the following steps, and if your DNS is set to Auto, set it to Manual. If it is set to Manual, set it to Auto.
Gen1 – switch to auto DNS from manual 8.8.8.8
1) Unplug and replug the power to reboot the system
2) Wait until you see the screen that says “Loading Portal” and within three seconds press the Menu button, which is to the lower left of the arrow keys, marked with three dots and three dashes.
3) Scroll down and select System Settings
4) Select Network
5) Select Wired (Ethernet)
6) Select Auto (DHCP)
7) Press OK to confirm
8) Press Home twice to return to the System Settings menu
9) Scroll down and select Reboot Device
Gen1 – switch to manual DNS 8.8.8.8 from auto DNS
1) Unplug and replug the power to reboot the system
2) Wait until you see the screen that says “Loading Portal” and within three seconds press the Menu button, which is to the lower left of the arrow keys, marked with three dots and three dashes.
3) Select Network
4) Select Wired (Ethernet)
5) Select Auto (DHCP), manual DNS
6) Enter 8.8.8.8 – use the right arrow key to move to each field, entering an 8 in each field
7) Press the OK button to save – after a moment you should see “successfully saved”
8) Press the Home button three times to return to the System Settings menu
9) Select Reboot Device
- How does ExpatTV work?
- What do I need to use ExpatTV?
- What is the cost of ExpatTV?
- How do I pay for ExpatTV?
- Do you have a list of available channels and other content?
- I live part-time in Mexico or another country and part-time in Canada, the U.S., or elsewhere. Can I use ExpatTV on a “seasonal” basis?
- Do I need a VPN to use ExpatTV?
- How do I order ExpatTV?
- How do I install my ExpatTV?
- Which Internet service providers (ISPs) work best with ExpatTV?
- What about cellular Internet service from Telcel or AT&T?
- How do I get in touch with ExpatTV?
- How do I update my credit/debit card or bank account information for payments?
- How do I pause and restart my ExpatTV service?
- How do I search for a specific Movie or TV Series?
- How do I request new channels, movies, TV series, events, concerts, or other content?
- What do I need to know about traveling with ExpatTV?
- How should I connect my ExpatTV system to my TV so that the HDMI and other cables are not visible?
- How do I use Subtitles and Closed Captioning (CC)?
- How do I tell which system I have – Gen1, Gen2, or Gen3?
- How do I do a manual Refresh on my Gen3 device running MyTVOnline3 (MOL3)?
- How do I delete recordings (Gen2+/Gen3)
- How do I clear notifications (MOL3)?
- My ExpatTV system/service is not working. What should I do?
- My TV has the message “No Signal” or “Is it on?”, or it has only a blank screen
- The time is incorrect on my ExpatTV system. How do I fix it?
- I am getting “Error! Please check your internet connection, Portal URL, User ID, and Password – Code 7” when launching MyTVOnline2 – What should I do?
- I am getting “Connect failed – Please check your internet connection and portal URL – Code: 1010” when launching MyTVOnline3 – What should I do?
- The TV Guide (EPG) information is not accurate. How do I fix this? (MOL2)
- The TV Guide (EPG) information is not accurate. How do I fix this? (MOL3)
- How do I fix problems with no audio or the audio and video being out of sync?
- Some of my channels have a lock symbol and ask for a PIN. Help!
- How do I install software updates?
- How do I move my ExpatTV system to another location or to a different TV?
- I am seeing stuttering / buffering on my ExpatTV but I can watch Netflix with no problem?
- I am seeing stuttering / buffering on my ExpatTV but my Speedtest is good?
- Troubleshooting Communication Problems / Stuttering / Buffering / Freezing / Repeating
- Clear Cache
- My ExpatTV repeatedly shows the error message “MyTVOnline2 keeps stopping”…Help!
- I’m having trouble recording using my Gen2+/Gen3/MOL3 system. Help!
- How do I perform a factory reset of my Z10 – Z10 Neo – Z10SE – Z10 Pro – Z10 Pro Max system?
- How do I perform a factory reset of my Z11 Pro – Z11 Pro Max system?
- How do I perform a factory reset of my Z8 – Z8 Pro – Z+ Neo system?
- My Gen1 device is stuck at “Loading…” Help!
How does ExpatTV work?
We provide a turn-key service that brings you live, high-definition TV programming in English from the U.S., Canada, and the U.K, as well as channels from other parts of the world. You connect a small streaming device to your TV via an HDMI cable, and to your Internet router via an ethernet cable or via wifi. ExpatTV then uses your Internet service to access our servers and content.
We also have apps that can bring you ExpatTV on your iOS devices (iPads and iPhones), Android devices, and Windows 10/11 devices.
We have every live TV channel you can imagine, including premium movie channels, local network channels from most major cities in the U.S., provincial/regional channels from Canada, countless sports channels, all major sports packages, and all major events and pay-per-view events. We also provide a huge (and growing daily!) library of on-demand movies, TV series (with no commercials!), documentaries, events, stand-up comedy, concerts, and more. New movies and episodes are added daily, and we take requests!
ExpatTV is very easy to use – it operates just like a cable/satellite system with a remote control. No complicated and frustrating Chinese Android boxes, Firesticks, keyboards, or mice. Just turn it on and it works like your TV from back home!
What do I need to use ExpatTV?
To take advantage of our ExpatTV service, you need two things:
- A television or other device that you can use for streaming. You do NOT need a smart TV – just a TV with an HDMI port. We also support Windows 10/11 devices, iOS devices (iPad / iPhone), and Android phones, tablets, and other devices. Our apps do NOT support casting or AirPlay from your device to your TV. To use a conventional television, you need one of our Gen2 or Gen3 streaming systems.
- Internet service with a consistent download speed of at least 20 megabits/second. To test your speed, use speedtest.net or speed.com. We recommend a “wired” provider over a wireless provider (radio/microwave), but we have many clients that use ExpatTV successfully via wireless Internet service. Our service also works well with Starlink satellite Internet service. For more information on Internet providers, see the FAQ “Which Internet service providers (ISPs) work best with ExpatTV?” and “What about cellular Internet service from Telcel or AT&T?” below.
What is the cost of ExpatTV?
We have only one content package that includes all live TV channels and all on-demand content that we have available. The cost of the service is $30 USD or 600 MXN per month for the first TV/device. For the second and subsequent TVs/devices that are in use at the same location/household, using the same Internet service and the same public IP address, we offer a discounted price of $20 USD each or 400 MXN each per month. This discount does not apply to commercial accounts. This is a one-time discount – if your systems/devices do not qualify for this discount at any given time, the discount is lost permanently.
Our prices are fixed in U.S. Dollars (USD) and in Mexican pesos (MXN) and do not vary with the USD:MXN exchange rate.
Each conventional TV requires its own ExpatTV system. We have two tiers of hardware that we offer, both of which include all programming:
1) Our ExpatTV Gen2 streaming system is a greatly upgraded system over our original Gen1 device with a much faster, friendlier, more intuitive, modern user interface, an enhanced TV guide, closed captioning on many live TV channels, more options for searching to find channels, and many other features. The one-time cost of a Gen2 system is $150 USD or 3000 MXN.
2) Our ExpatTV Gen3 streaming system offers all the features of the Gen2 device, plus DVR functionality. You can do ad-hoc recording of live TV, scheduled and recurring recordings, picture-in-picture, and watch one live TV channel while recording another. You can also pause/rewind/fast forward live TV, which, among other features, allows you to skip commercials while watching live TV. Our Gen3 systems use a newer version of our app than do our Gen2 systems, so there are differences in the user interface, but both are very intuitive. The one-time cost of a Gen3 system is $300 USD or 6000 MXN.
How do I pay for ExpatTV?
We use a secure payment processor in the U.S. and the vast majority of our clients pay via credit card or debit card from the U.S. or Canada. Mexican cards and cards from other countries will usually work as long as they allow international transactions (because the payments occur in the U.S). The majority of our clients set their payments to auto-pay for convenience.
For payments in Mexican pesos (MXN) we can accept transferencias interbancarias from your Mexican bank account to ours. We can also accept payments in cash (MXN) via deposits at branches of our bank. At present we are not able to accept payments at Oxxo or at other retail locations.
Do you have a list of available channels and other content?
We do not publish a list of channels or other content, but we have over 1700 channels (up to 2000+ on days with many sporting events), mostly in English from the US, Canada, and the UK, including Premium/Movie channels, local channels from more than 85 markets/cities in the U.S., all major news networks, and all major sports packages. We also have a huge library of on-demand movies and TV series (without commercials). And if we don’t have channel or on-demand content that you want, you just request it and we will add it if possible.
I live part-time in Mexico or another country and part-time in Canada, the U.S., or elsewhere. Can I use ExpatTV on a “seasonal” basis?
Yes, you can use ExpatTV on a seasonal basis as long as you own the equipment. Just notify us when you want to pause the service, and again when you want to reactivate it. For more information see the FAQ “How do I pause and reactivate my ExpatTV service?” below under General Information.
However!
Please keep in mind that ExpatTV works anywhere in the world as long as you have reliable Internet service. Very few of our “snowbird” clients pause their service – they instead take their ExpatTV system back to their other home, or anywhere else they travel!
Early clients had the option of renting the equipment and therefore they do not own it. In these cases, we can only pause your ExpatTV service if you purchase the equipment.
Do I need a VPN to use ExpatTV?
No VPN is needed to use ExpatTV. The servers are ours and they are dedicated, used exclusively for ExpatTV, and we do not impose any geographic restrictions. ExpatTV will work anywhere in the world as long as you have reliable, consistent Internet service. The only circumstances under which we recommend use of a VPN is if you are experiencing routing, congestion, or saturation problems between your ISP and our datacenters, or if you suspect that your ISP is blocking or throttling your traffic or otherwise playing games with you.
How do I order ExpatTV?
Due to import restrictions by the Mexican government and U.S. tariffs, we no longer sell the equipment needed to use our ExpatTV service. Instead, new clients order their equipment from Amazon US, Amazon Canada, Amazon México, or elsewhere. Place an order on our website (link below), and based upon your equipment selection and your location, we will send links and instructions for you to order your equipment.
Click Here to Order ExpatTV Now!
You can also click the “Order Now!” link in the menu bar to the left of this page.
Make sure you fill out all of the required fields/questions. When you click Submit, you should get an on-screen confirmation message, and then a confirmation email. If you don’t see the email, check your Junk / Spam folder.
Once you have received your equipment, we will send your setup instructions and credentials to access our servers as well as the invoice for the first month of service.
For BYOD (Bring Your Own Device) accounts (iOS, Android, Windows, etc.), since you already have your device/equipment, we will send your setup instructions and credentials to access our servers as well as the invoice for the first month of service.
How do I install my ExpatTV?
Self-Installation
We will provide you with links and information to purchase the equipment in your country, and you prepare it for use. Installation consists of connecting the ExpatTV equipment to your TV using the included HDMI cable, and then connecting it to your Internet using wifi, just as you would a phone or other device. Or, if practical, you can also connect the ExpatTV system to your Internet using an ethernet cable. Optimal performance is achieved using an ethernet cable or a mesh wifi system. Self-Installation will get you up and running with ExpatTV as quickly as possible! We provide step-by-step instructions, support, and a Quick Start Guide.
On-Site Technician Install
We no longer offer on-site technician installations.
Which Internet service providers (ISPs) work best with ExpatTV?
We do not recommend or endorse any ISP, and your mileage with a particular provider may vary. Generally speaking, fiber optic Internet providers work well with ExpatTV. Our clients have reported good performance and successful viewing in México with:
Telmex (fiber optic)
TotalPlay
Abix
Digitcenter
Izzi (fiber optic)
Izzi / Wiz / Cablemas using the older coax technology is a decent option, but they have more outages and service problems than do the fiber optic providers. We have hundreds of clients using Izzi with only occasional problems.
For clients in the U.S., Canada, and other countries outside of México, we have experienced good result with all Internet providers that our clients have tried with the exception of wireless (radio/microwave) providers in very remote areas of the U.S., Canada, and Europe.
We recommend “wired” Internet service over wireless (radio or microwave) providers. Wireless technology is constantly improving, but there can be a great deal of variation that can cause frustration. Also, many wireless providers are small and independent and often do not have adequate capacity to service all of their clients during peak times of the day – particularly evenings on weekdays and afternoons and evenings on weekends. However, we have quite a few clients using ExpatTV via competent wireless Internet providers that have adequate resources to provide their promised/contracted bandwidth.
We have quite a few clients that have switched to Starlink. Starlink is expensive up-front to purchase the equipment, but then fairly economical on a monthly basis, at least in México. Starlink provides a good option for clients that have no other good options, but it has some variation at times and does not perform well during storms. We also notice more frequent capacity and routing issues with Starlink, presumably due to the rapid growth of their installed client base.
If you have a different provider, feel free to message us for our experience with a particular provider.
What about cellular Internet service from Telcel or AT&T?
We do not recommend use of our ExpatTV service in México via Telcel or AT&T cellular Internet service. The speed is more than we need and both providers are generally very consistent – the problem is the monthly data caps. Streaming live TV consumes one to two gigabytes per hour. So even if you have the largest package from Telcel or AT&T, which is 200 gigabytes per month, you will have 100 to 200 hours per month of streaming before you hit the data cap. When you hit the data cap, they will slow your service down to 1 megabit/second, which is too slow for streaming. To overcome this, you go to Telcel’s or AT&T’s website any pay 100 pesos for another 25 gigabytes.
We have a long-time client in Chuburná, Yucatán that has no other options for Internet and uses Telcel with good success, but they have learned to “ration” their TV viewing so that they don’t hit their limit. For example, during American Football season and during Major League Baseball season, they don’t watch much other TV so that they can watch Football and Baseball.
If you have Telcel or AT&T cellular Internet service and have no better options, you may wish to consider using Starlink or a competent wireless Internet provider. See our comments about Starlink in the “Which Internet service providers (ISPs) work best with ExpatTV?” FAQ.
How do I get in touch with ExpatTV?
All communication with us, for support, billing, requests, or any other matter, is via our website or via email to:
Sales: sales@expattv.org
Support/Billing/Other: help@expattv.org
General Pre-Sale Info: info@expattv.org
To request that we add channels, movies, TV series, or other content, please use the Requests form on our website – there is a link on the menu at the left side of this page.
You can also visit our website and use our beacon for Support (“We’re here to help!” in the lower right corner), or select the appropriate form for Orders/Sales, Requests, Support, or Info.
We do not make or receive voice calls, video calls, Whatsapp messages, or text messages, ever. And since we don’t accept voice calls, do not leave voice mail – we cannot retrieve it.
Please DO NOT message us via Facebook Messenger. Facebook’s Business Suite is terrible with regard to notifying us of new messages – we may not know that you sent us a message on Facebook for days.
Please DO NOT send us text messages. Our cellular coverage is non-existent where we are based and we will likely not receive your text messages.
How do I update my credit/debit card or bank account information for payments?
If your billing account is set to auto-pay using a payment method saved to your account, you can use a prior month’s payment receipt (email) to update your credit / debit card or bank draft details. The email receipt contains a link that says “Update payment method”. Click on this link and update as needed. If you were not previously set to use auto-pay, then your receipt will not have this link.
Starting in August of 2025, our billing system will send your invoice via email four to seven days prior to the due date. If your account is already set to auto-pay, this email will contain a link to “Update payment method”.
PLEASE NOTE: Our payment processor does not have a portal into which clients can log in to update their payment methods.
Occasionally our payment processor in the U.S. has made changes to their system that impacts your ability to update your payment method. If you try to update and are unsuccessful, and/or you get the message “Sorry. The information you entered was not accepted. Please confirm your card information”, then the payment processor is having an issue. Instead, click on the link that reads “Remove my card” or “Unlink my card” to delete the current card, then wait for your next invoice and use the new card to pay it, and check the box that reads “Save my card on file with ExpatTV”.
How do I pause and restart my ExpatTV service?
If you would like to temporarily pause your ExpatTV service, please visit our website and complete the “Pause / Restart ExpatTV Service” form located at: https://expattv.org/pause-restart/
Your ExpatTV service will be paused at the end of your current pre-paid billing period. We do not prorate partial months.
Then, when you are ready to reactivate your ExpatTV service, just visit the form again and submit your request to restart your ExpatTV service. There is no need to contact us in advance as we cannot schedule your restart in advance. Activation takes place quickly once we receive and process your request. Contact us on the day you want to restart, or one day prior, and your ExpatTV service will be reactivated. Your billing date will be reset to the date that your service is restarted. For example, if you ask us to reactivate your service on June 22, then we will do so, and your billing due date will be reset to the 22nd of each month.
You may pause your ExpatTV service once per calendar year at no cost. This does not carry forward to the next year if it goes unused. Once per year, period. Each additional pause after the first one in a given calendar year will incur an administrative fee of $30.00 USD.
We only have a few clients who turn their service off/on. The vast majority of part-time residents of Mexico get comfortable with their ExpatTV service, and they take their devices back to the U.S., Canada, Europe and elsewhere, around the world!
How do I search for a specific Movie or TV Series?
For Gen2 and Gen2+ systems using MOL2 (MyTVOnline2):
While in the VOD (Movies) or TV Series section of the app:
- Press the Groups button
- Place the cursor on the ALL group
- Scroll right to the movies/TV series, then scroll up and select the magnifying glass
- A keyboard will pop up – type any part of the name of the content that you are looking for – content will filter dynamically as you type each character
- When you see what you are looking for, press the Back button to remove the keyboard, and then select the desired content
For Gen3 systems using MOL3 (MyTVOnline3):
While in the Live TV, VOD (Movies) or TV Series section of the app:
- Press the Groups button
- Select any group EXCEPT Favorites (it doesn’t matter which group you select as searches in MOL3 are global – they search all content across all content types)
- Scroll right to the movies/TV series, then scroll up and select the magnifying glass
- A keyboard will pop up – type any part of the name of the content that you are looking for, then select the magnifying glass at the bottom right of the on-screen keyboard
- Your search results will be displayed.
- By default you will see content from the section of the app that you are currently in (Live TV, VOD, or TV Series). Use the left /right arrows to navigate to other content sections.
- Press the down arrow, then the left/right arrows to select your desired content
- Press the OK button on the remote control to start that content
How do I request new channels, movies, TV series, events, concerts, or other content?
For content requests, please utilize our Requests system on our website at https://ExpatTV.org/requests/
We no longer accept requests via Whatsapp as it became too difficult to manage and too many content requests were falling through the cracks and going unfulfilled.
Most mainstream new movies and TV series will already be in our “Watch” system by the time you see the commercial or read about it. There is no need to request big-budget movies, nor new seasons of TV series that we already carry. If a new season has started and we do not have it after one week, you may request it.
PLEASE do a Refresh (Gen2 /Gen2+/Gen3 only) and then search for content before requesting it!
A large percentage of the requests we receive is for content that we already have. PLEASE do a search first, and make sure your spelling is correct – Google is your friend.
For live TV channels, give us any of the following that is relevant:
- The exact channel name
- The network (CBS, ABC, etc) if it’s a local market channel
- The channel # if it’s a local market channel
- The call letters if it’s a local market channel
For movies and TV series, give us any of the following that is relevant:
- The exact name of the movie or TV series (please make sure that you spell it correctly and that you give us the EXACT name)
- The year that the movie was released or that the TV series first aired
- The leading actors/actresses in the movie or TV series
- The platform / network / streaming service where the movie or TV series originated
1) We make no promises as to when, or if, requested content will be available.
2) Content requests are fulfilled as time permits.
3) Please do not contact us asking for status – it will be available if/when it is ready.
4) Please do not submit duplicate requests.
What do I need to know about traveling with ExpatTV?
Yes! You can take ExpatTV anywhere you travel and have the same channels and on-demand content available, anywhere in the world!
First, one VERY important step to take BEFORE you leave home…
Many hotel and condo wifi systems require a web browser in order to log in, usually providing your name and room number or other identifying information. It is important that you install a web browser while you are connected to your own Internet/wifi, BEFORE you leave, or you can create a Catch-22 where you cannot connect to wifi because you don’t have a web browser, and you can’t download a web browser because you don’t have wifi. Use the Market app or the Google Play app on your system’s home screen or in the Locker on the home screen to install a web browser. We recommend Chrome.
Then, when at the hotel or condo, the host’s wifi login should spawn a browser window so that you can finish logging in.
If the wifi system to which you are trying to connect does not automatically open a browser window, you will need technical assistance from the hotel’s or the condo’s personnel. We cannot help you troubleshoot a wifi system that we know nothing about.
If you find yourself on the road and without the needed browser, you can set up a mobile hotspot using your cellular phone, attach the ExpatTV system to your phone’s hotspot via wifi, and use the hotspot’s Internet access long enough to download a web browser.
Second, BE SURE THAT YOU TAKE THE REMOTE CONTROL!
Safe and adventurous travels!
How should I connect my ExpatTV system to my TV so that the HDMI and other cables are not visible?
One option is to mount the ExpatTV system to the bottom or to the back of the TV. We often use double-sided Gorilla Tape. Your mileage may vary and we make no guaranty regarding your outcome. You should be careful not to damage the ExpatTV system nor your TV.
If the TV is too thin to securely mount the ExpatTV system, or too close to the wall to accommodate the HDMI cable in the rear of the ExpatTV system, you can mount the ExpatTV system to the back of the TV, either facing downward or to the side. Leave about one inch / 2.5 centimeters of the ExpatTV system protruding below/to the side of the TV, with the status light pointing down or to the side. The remote control is infrared, so you need a line-of-sight between the remote control and the ExpatTV system for proper control. Test the remote control BEFORE you mount the ExpatTV system permanently – Gorilla Tape is VERY difficult to remove once it is secured.
How do I use Subtitles and Closed Captioning (CC)?
For Gen1 devices:
A fair amount of our on-demand content has English subtitles. If you have a Gen1 device, English subtitles will appear automatically if they are available. If you wish to turn off subtitles on a Gen1 system, press the APP button (left column, fourth button from the top) and then select Subtitles and set to OFF. Gen1 devices do not support Closed Captioning on live TV channels.
For Gen2/Gen2+/Gen3 devices:
Subtitles in VOD/TV Series:
- Press Ok while watching
- Scroll down to the bottom row
- Scroll left and select Subtitle.
- It will list what is available. Select English if it is listed.
If you want subtitles to appear by default if the content includes subtitles:
- Press Menu
- Scroll down and select Settings
- Scroll down and select Subtitle Language
- Select English
There is also an Online Subtitle feature detailed below that will allow you to search for subtitles for content that does not have them.
Closed Captions in Live TV:
Some of our mainstream live TV channels have Closed Captioning. You will know because in the first five seconds after you go full-screen with on particular channel, it will show the name of the channel, and then to the right there will be one or more squares with “HD”, or “FHD”, or “CC” inside the box. If there is a CC, then the channel has closed captions.
To activate Closed Captioning:
- Press Ok twice
- Press the down arrow for Actions
- Scroll left and select Settings
- Scroll down and select Subtitle
- Select Closed Caption
- Press the Back button to exit
Online Subtitles:
To setup Online Subtitles:
- Within MyTVOnline2, press Menu
- Select Settings
- Select Player Options
- Select Online Subtitles
- Select Sign-up to create an account with OpenSubtitles.com – enter your desired User ID, your email address, and desired password.
- You will receive a confirmation email – confirm the new account.
- OpenSubtitles.com no longer provides their complete service for free – there is a daily limit to the quantity of subtitles that you can download. To overcome this limitation, go to OpenSubtitles.com using a web browser, log in using the account you just created, and upgrade to VIP for $20 USD per year. The developer of our apps has plans to incorporate another service that will provide online subtitles free of charge, but there is no timeline for when this will be implemented.
- Back on your ExpatTV system, select Sign-in and log in using your User ID and password that you just created.
- Select Preferred Languages and use the entries in the far-right column to de-select any languages that you do not need.
- When finished, scroll to the left and select Complete.
To use Online Subtitles:
- When watching a movie, press OK
- Scroll down to the bottom row
- Scroll left and select Subtitle.
- Select Online Subtitles
- Select your desired language
- In the Search Text field, it will place the title of the movie as it appears in our system. It’s best to use ONLY the movie’s title and the year it was released. Remove the parenthesis, leaving just the movie’s title and numeric year. Delete all other text, including the “New”, “720p”, “1080p” etc.
- Select the Return key or the Check Mark key on the on-screen keyboard
- Select OK to search
- It will list the subtitle choice that it finds…select one
- If the subtitles that appear are out of sync with the movie’s audio, repeat the same procedure and select a different option after searching.
- When prompted “Overwrite existing subtitle file?” select OK.
How do I tell which system I have – Gen1, Gen2, or Gen3?
Our Gen1 systems are manufactured by Infomir in Ukraine. Some models have a logo “MAG” in large letters on the top of the device…
This is a Gen1 system:
Other models have a red circle on the top of the device…
This is also a Gen1 system:
If you do not have one of the two above devices, then you have a Gen2 or Gen3 system.
The following are common Gen2 devices, all manufactured by Formuler in South Korea: Z8, Z8 Pro, Z+ Neo, GTV, Z10, Z10SE, Z10 Neo, Z10 Pro, Z10 Pro Max. Any member of the Z8 and Z10 families are usable as a Gen2 device
Gen3 systems are members of the Z11 family, including Z11 Pro, Z11 Pro Max, and Z Mini.
How do I do a manual Refresh on my Gen3 device running MyTVOnline3 (MOL3)?
MyTVOnline3 (MOL3) Manual Refresh:
1) Press Menu
2) Select Content Manager
3) Select Data Sync
4) Select Contents Data
5) Select Refresh
6) It will say “Refresh Start” at the bottom center of the screen, then after 10-15 seconds it will say “New content has arrived” in the lower right corner
7) Press Back three times to return to live TV
8) Press Menu
9) Select “Refresh Contents” at the top of the menu – this menu item only appears when there is new content available to be imported
You can also schedule a daily Refresh under Data Sync –> Auto Update Settings. It defaults to 5:00am. 13:00pm or later would be better as we update a lot of content in the morning hours, Eastern Standard Time.
How do I delete recordings (Gen2+/Gen3)
For systems using the MyTVOnline2 (MOL2) app:
- Press the Menu button
- Select Recordings
- Use the up/down arrows to select the recording date from which you wish to delete.
- Scroll to the right where the recordings are listed
- Long-press (press and hold) the OK button
- A check box will appear in the upper right corner of each recording
- Check the recording(s) that you wish to delete
- You may also scroll to the bottom of the screen and select “Select All” or press the Red button to select all recordings for that recording date
- Scroll to the bottom of the screen and select “Delete” or press the Green button to delete the selected recordings
- Select OK to confirm
- If you deleted all of your recordings, you will get a message that appears to be an error message – it is not an error – it is simply saying that you don’t have any recordings. Just select OK.
For systems using the MyTVOnline3 (MOL3) app:
- Press the Menu button
- Select Recordings
- Scroll to the right where the recordings are listed
- Long-press (press and hold) the OK button
- A check box will appear in the upper right corner of each recording
- Check the recording(s) that you wish to delete
- You may also press the Red button to select all recordings
- Press the Green button to delete the selected recordings and confirm
- Select OK to confirm
- If you deleted all of your recordings, you will get a message that appears to be an error message – it is not an error – it is simply saying that you don’t have any recordings. Just select OK.
How do I clear notifications (MOL3)?
- Within MyTVOnline3, press the Menu button
- Select Notifications
- Press the Red button on the ExpatTV remote control to “Mark all notifications as read”
My ExpatTV system/service is not working. What should I do?
If your ExpatTV system or service is not working correctly, the first thing you should do is to restart/reboot it. The steps are very different between Gen1 and Gen2/Gen2+/Gen3 systems.
Click Here if you’re not sure which system you have.
Gen1 Restart Instructions:
To restart/reboot a Gen1 system, simply unplug the power cord from the back of the ExpatTV device and then plug it back in. The system will reboot and then take you back into the ExpatTV portal.
Gen2/Gen2+/Gen3 Restart Instructions:
Try to avoid unplugging the power from your ExpatTV Gen2/Gen2+/Gen3 system. It has local storage/memory than can become corrupted. You should only unplug the power if you have a black screen or a “No Signal” message and you are sure that you have selected the correct HDMI port/input/source using the TV’s remote control.
Instead of unplugging the power, do a Restart:
- Press and hold the STB button (top-right or top-center button on the remote control)
- Select Restart when the menu pops up. The system will restart and take you back into ExpatTV.
My TV has the message “No Signal” or “Is it on?”, or it has only a blank screen
First, using the TV’s remote control, make sure that you have selected the appropriate HDMI port / input / source to which the ExpatTV system is connected.
If you are sure that you have selected the correct HDMI, and the ExpatTV system is turned on (white light on the front) and you still do not have an image on the TV screen, then unplug and replug the power to the ExpatTV system. You should then see an image on the TV screen.
If you still don’t have an image on your screen and/or you see “No Signal” or “Is it on?”, there may be an HDMI issue. Do these steps in order:
1) Unplug and replug both ends of the HDMI cable
2) Try a different HDMI port on the TV
3) Try a different HDMI cable
4) Try a different TV
The time is incorrect on my ExpatTV system. How do I fix it?
You ExpatTV system sets its date/time from your Internet service based upon the time zone that is selected. To select your time zone:
Gen2, Gen2+, and Gen3 systems:
- Press the Home button to go to the home screen
- Scroll down (or up and to the right for some systems) and select the “gear” icon for Settings
- Some systems will prompt you for a PIN. If asked for a PIN, enter it and then select the Tab or Return key on the on-screen keyboard. If you don’t know your PIN, contact us and we will give the PIN to you. If it does not ask you for a PIN, skip this step.
- Scroll down and select Device Preferences. If your system does not have Device Preferences, you should have an option for “Date & Time” – select this instead.
- Select Date & Time
- Scroll down and select Set Time Zone
- Select the appropriate time zone and press OK.
- For clients in the state of Quintana Roo, México, select Bogota, Colombia (GMT -5:00). Colombia always uses Eastern Standard Time and does not observe Daylight Savings Time.
- For clients in the state of Yucatán, México, select Costa Rica (GMT -6:00). Costa Rica always uses Central Standard Time and does not observe Daylight Savings Time.
- For clients on the Pacific side of Mexico, select Chihuahua (GMT -7:00).
- For clients in the U.S, Canada, Europe, Asia, and elsewhere, select the appropriate time zone for your location.
- Press the Home button
- Do a Restart by pressing and holding the STB/Power button (top right button on the remote control) and then select Restart when the menu pops up. Your on-screen time in the Guide should now be correct!
I am getting “Error! Please check your internet connection, Portal URL, User ID, and Password – Code 7” when launching MyTVOnline2 – What should I do?
“Error – Please check your internet connection, Portal URL, User ID, and Password – Code 7”
If you are receiving Error 7 when launching ExpatTV, below are the most likely causes:
A) Your ExpatTV system is not connected to your Internet service/Wifi
If you are connecting your ExpatTV system to your Internet router via wifi, double-check that it is connected.
- Press the Home (house) button to go to the Home screen
- Scroll to the bottom of the screen and select the Network Settings app (second from the left with the wifi symbol or a <…> symbol)
- If prompted for a PIN, enter your PIN
- Select your wifi access point name, and enter your password (just like you would with your phone or tablet)
- Once connected to your wifi, press the Home button, scroll to the top of the screen and launch the MyTVOnline2 app.
Also, if while the message is “Connecting to ExpatTV #1 & Video Club”, you see “Waiting for network connection (x/3)” along the top right of the screen, either your system is not connected to your Internet service, or your Internet service is down or otherwise has a problem. Use the steps above to verify your Internet connection.
If you are connecting your ExpatTV system to your Internet router via ethernet cable, double-check that both ends of the ethernet cable are securely connected and that the cable is not damaged.
B) Your access credentials (User ID and Password) are incorrect
If you are accessing ExpatTV for the first time, or you have performed a factory reset of your system, or you have changed your User ID and/or Password, they may be incorrect:
- At the error message, select OK
- Select ExpatTV #1 & Video Club
- Select Edit
- Verify that the User ID is correct. In most cases, there is an underscore (“_”) between your names. There are never spaces in the User ID.
- Scroll down to the Password field, then scroll right and select the eyeball icon to expose the Password
- Verify that the Password is correct
- If you made any changes/corrections, scroll down and select Connect
C) Your ExpatTV service is inactive due to non-payment
Verify that your account is paid. We see this frequently when a credit or debit card is expired or cancelled, or an automatic payment transaction is declined. Your ExpatTV service is subject to disconnection at any time after the due date of the invoice. If our requests for payment are going to your Junk / Spam folder, mark them as “not junk” and add messenger@messaging.squareup.com to your email contacts to insure deliverability of our emails.
D) Something is blocking your access to ExpatTV
If you have recently changed to a different Internet provider (ISP), or a different Internet router, or a new mesh wifi system or other wifi equipment, or implemented any security hardware or software, one of these may be blocking your access to our servers. For example, Netgear Orbi mesh wifi systems include Netgear’s Armor software, which blocks URLs that it does not trust. Disable Netgear Armor or whitelist our URLs.
If you have done everything listed in this post and still get the error, contact us via the Support link at the left of this page and we will try to help you troubleshoot.
I am getting “Connect failed – Please check your internet connection and portal URL – Code: 1010” when launching MyTVOnline3 – What should I do?
“Connect failed – Please check your internet connection and portal URL – Code: 1010”
If you are receiving error Code 1010 when launching ExpatTV, below are the most likely causes:
A) Your ExpatTV system is not connected to your Internet service/Wifi
If you are connecting your ExpatTV system to your Internet router via wifi, double-check that it is connected.
- press the Home (house) button on the remote control to go to the Home screen
- scroll to the top of the screen, then to the right and place the cursor on the “gear” icon for Settings.
- scroll down once and right once to the network settings app (with the wifi symbol or a <…> symbol) and press the OK button on the remote control.
- if prompted for a PIN, enter your PIN
- select your wifi access point name, and enter your password (just like you would with your phone or tablet)
- once connected to your wifi, press the Home button, scroll to the left and down and launch the MyTVOnline3 app.
If you are connecting your ExpatTV system to your Internet router via ethernet cable, double-check that both ends of the ethernet cable are securely connected and that the cable is not damaged.
B) Your access credentials (User ID and Password) are incorrect
If you are accessing ExpatTV for the first time, or you have performed a factory reset of your system, or you have changed your User ID and/or Password, they may be incorrect:
- at the error message, select OK
- select ExpatTV #1 & Video Club
- scroll right to the “pencil” icon for Edit and press the OK button
- verify that the User ID is correct. In most cases, there is an underscore (“_”) between your names. There are never spaces in the User ID.
- scroll down to the Password field, then scroll right and select the eyeball icon to expose the Password
- verify that the Password is correct
- if you made any changes/corrections, scroll down and select Connect or Update
C) Your ExpatTV service is inactive due to non-payment
Verify that your account is paid. We see this frequently when a credit or debit card is expired or cancelled due to fraud, or an automatic payment transaction is declined. Your ExpatTV service is subject to disconnection at any time after the due date of the invoice. If our requests for payment are going to your Junk / Spam folder, mark them as “not junk” and add messenger@messaging.squareup.com to your email contacts to insure deliverability of our emails.
D) Something is blocking your access to ExpatTV
If you have recently changed to a different Internet provider (ISP), or a different Internet router, or a new mesh wifi system or other wifi equipment, or implemented any security hardware or software, one of these may be blocking your access to our servers. For example, Netgear Orbi mesh wifi systems include Netgear’s Armor software, which blocks URLs that it does not trust. Disable Netgear Armor or whitelist our URLs.
If you have done everything listed in this post and still get the error, contact us via the Support link at the left of this page and we will try to help you troubleshoot.
The TV Guide (EPG) information is not accurate. How do I fix this? (MOL2)
For Gen2 and Gen2+ systems with MyTVOnline2:
If your EPG (TV Guide) information is not correct, first verify that the date and time listed in the upper-right corner of the Guide is correct.
If not, first do a Restart – Press and hold the STB/Power button (top right button on the remote control) and then select Restart when the menu pops up.
If the date/time is now correct, check to see if your EPG data is now correct. If your EPG data is still not accurate, proceed with the steps below to clear and reload your EPG data.
If the date/time is NOT correct, verify that your time zone is set correctly. Click here for instructions for checking/changing your time zone.
If your time IS correct, you should clear your EPG data and allow it to re-populate:
- Exit the Guide
- Press the Menu button
- Scroll down and select Settings
- Scroll down and select Clear EPG Data and confirm
- Press Menu and select Live TV
It will take several minutes to populate the guide, and programs that have already started will say “No information”, but future shows should be populated with EPG information.
The TV Guide (EPG) information is not accurate. How do I fix this? (MOL3)
For Gen3 systems with MyTVOnline3:
If your EPG (TV Guide) information is not correct, first verify that the date and time listed in the upper-right corner of the Guide is correct.
If not, first do a Restart – Press and hold the STB/Power button (top right button on the remote control) and then select Restart when the menu pops up.
If the date/time is now correct, check to see if your EPG data is now correct. If your EPG data is still not accurate, proceed with the steps below to clear and reload your EPG data.
If the date/time is NOT correct, verify that your time zone is set correctly. Click here for instructions for checking/changing your time zone.
If your time IS correct, you should clear your EPG data and allow it to re-populate:
- Exit the Guide
- Press the Menu button
- Select Content Manager
- Select Data Sync
- Select EPG Data
- Select Clear and Update EPG and confirm
It will take several minutes to populate the guide, and programs that have already started will say “No information”, but future shows should be populated.
There was a bug in a version of MyTVOnline3 that caused your EPG (guide) information to disappear after using our Rewind! capabilities. Make sure that your ExpatTV system is updated to the newest version of the app to prevent this problem. Instructions for installing software updates are here:
How do I fix problems with no audio or the audio and video being out of sync?
If you are seeing a channel with no audio, or audio/video out of sync – meaning that the sound does not match the picture, or the voices do not match up with the mouths that are speaking – this is an issue with individual channels. There are two options:
Less mainstream channels are “on-demand” streams that do not start until someone is watching them. You may be able to restart these yourself by just switching to a different channel for at least 90-120 seconds and then switching back to the original channel. This is because the less popular channels start and stop on-demand, so by switching away, the stream will eventually stop, and then by switching back it will restart. As an example, many channels in the Locals / Regionals group (local network channels from various U.S. cities) are on-demand channels. This method will only work if you are the only client currently watching that specific channel. If someone else is also watching the same channel (obviously you have no way of knowing this), then when you switch to a different channel, the stream will not stop and therefore will not restart.
If switching to a different channel and then coming back after a delay of 90-120 seconds does not work, we will need to restart the channel. If the above procedure does not correct the problem, use the following form to report the EXACT and FULL CHANNEL NAME…
https://expattv.org/support/report-a-content-problem/
DO NOT send us a channel number as channel numbers vary for different clients.
A/V sync issues are channel-specific. Restarts and Refreshes on the client’s side generally do not help.
Some of my channels have a lock symbol and ask for a PIN. Help!
(Gen2 / Gen2+ / Gen3 systems only)
It’s easy to accidentally lock a channel because the lock is right next to Favorite on the Actions menu.
The default PIN is 0000 (four zeros).
Once you temporarily unlock the channel, to remove the lock:
- press OK twice
- press the down arrow for Actions
- scroll right and select the lock
- enter the PIN (0000) again, and it will unlock
How do I install software updates?
There are periodic software updates released for our Gen2, Gen2+, and Gen3 devices. These are released to fix bugs and other problems and to improve the overall stability and usability of the system. To install updates:
For Gen2 and Gen2+ systems:
- Press the Home button (house icon) on the ExpatTV remote control to go to the home screen.
- If you see “Software Update” under the Quick Settings section of the home screen, select it
- If you do not see the Quick Settings section, do the following:
a) Scroll to the bottom of the home screen and select “Launcher Settings”.
b) When prompted, enter your system’s PIN. If you do not know the PIN, contact us and we will provide it.
c) Select Parental Settings.
d) Enter your PIN again
e) Select Show Quick Settings to move the slider from left to right – it will turn blue.
f) Press the Home button to return to the home screen. You will now have a Quick Settings section. Select the Software Update app. - The system will check for updates and list any that are available. If there are updates available, in the blue box on the left side of the screen it will say “Start Update”. Press the OK button.
- The available updates will install, and then the system will restart.
- When the system comes back up, go to the home screen again and repeat the same process, and after check for updates, it should say “Current Version is Latest” in a grey box on the left side of the screen. If not, the box will be blue – press OK to install additional updates.
For Gen3 systems:
- Press the Home button (house icon) on the ExpatTV remote control to go to the home screen.
- Scroll up, then right to the “gear” icon for Settings
- Scroll down and select Software Update
- The system will check for updates and list any that are available. If there are updates available, in the blue box on the left side of the screen it will say “Start Update”. Press the OK button.
- The available updates will install, and then the system will restart.
- When the system comes back up, go to the home screen again and repeat the same process, and after check for updates, it should say “Current Version is Latest” in a grey box on the left side of the screen. If not, the box will be blue – press OK to install additional updates.
How do I move my ExpatTV system to another location or to a different TV?
The process of disconnecting and reconnecting your ExpatTV system is very simple:
If you are moving your ExpatTV system because you are traveling and/or staying in a hotel or condo, review the following post for important travel information: Traveling with ExpatTV
To disconnect:
- Gen2/Gen2+/Gen3 users need to properly shut down your ExpatTV system by pressing and holding the STB button (top right button on the remote control) and then select “Power Off” when the menu pops up. Gen1 systems do not need this step.
- Disconnect the HDMI cable from the TV.
- Unplug the power adapter from the electrical outlet.
- If applicable, unplug the ethernet cable from your switch/router.
- Take all cables and components with you. MAKE SURE YOU TAKE THE REMOTE CONTROL!
To reconnect:
- Connect the HDMI cable from the ExpatTV system to the new TV. Note which HDMI port you connected it to (HDMI 1, HDMI 2, etc).
- Turn on the TV and use the TV’s remote control to select the HDMI port / source / input to which you connected the HDMI cable.
- If applicable, connect the ethernet cable from your ExpatTV system to your switch or router. If you are using Wifi to connect your ExpatTV system to your Internet service, this step does not apply to you.
- Plug the power adapter for the ExpatTV system into an electrical outlet. The system will start up. Any time the system loses power, either due to a power outage or due to it being unplugged from electricity, when it comes up, it will start a Shutdown Countdown for 10 seconds. Press the OK button or the Back button on the ExpatTV remote control to cancel this countdown.
- In most cases, the MyTVOnline application will launch automatically. If you are using an ethernet cable, your TV programming should start. If MyTVOnline does not start, select the MyTVOnline app in the top row of the home screen.
- If you are NOT using an ethernet cable, you will need to connect the ExpatTV system to your Internet service via Wifi…
- Press the Home button on the ExpatTV remote control to return to the home screen.
- Scroll to the bottom row of the screen and select the Network Settings app (second from the left with the Wifi symbol or a <…> symbol).
- After a few moments, it will populate with a list of the Wifi access points that it sees.
- Select your Wifi access point name and enter your Wifi password.
- Once it says “Connected”, scroll to the top row of the screen and launch the MyTVOnline app.
You should be in!
With one exception, you do not need to notify us of your move. You will automatically be connected to the appropriate datacenter based upon your new geographic location. The exception is if you are moving from México to another country. We often use manual DC (datacenter) mappings to insure the best performance with various Mexican ISPs. When you return to the U.S., Canada, or elsewhere, you may see performance problems due to the static mappings to our various datacenters. If you see performance problems after leaving México, contact our Support team via our website and explain your situation and ask them to remove any static mappings.
I am seeing stuttering / buffering on my ExpatTV but I can watch Netflix with no problem?
Comparisons between ExpatTV and Netflix are completely irrelevant for two primary reasons:
- Netflix is NOT Live TV. Netflix is static content that has been pre-processed to be able to adjust to fluctuating Internet conditions. This is not possible with 1500+ channels of live TV, which therefore consumes more bandwidth and is more sensitive to Internet fluctuations. ExpatTV needs 5x to 10x the amount of consistent bandwidth that Netflix needs. Therefore, Netflix can operate satisfactorily when you are “bandwidth challenged” due to outages, re-routes, and/or congestion.
- Netflix has servers very close to you. Netflix has servers on the private networks of most major ISPs, including Telmex, Izzi, MegaCable, and TotalPlay here in México. That means that your Internet traffic between you and Netflix only has to travel short geographic distances and never leaves your ISP’s private network, so it is not subject to congestion, outages, and re-routes along the Internet backbone as is the case when you are communicating with ExpatTV’s servers in the U.S.
I am seeing stuttering / buffering on my ExpatTV but my Speedtest is good?
Your Speedtest is (almost) completely irrelevant in the context of ExpatTV. Your Speedtest only measures the speed between you and your ISP, which is usually located geographically very close to you and never has to traverse any external networks – all communication is within the private network of your ISP and therefore is not subject to the slings and arrows of the Internet.
The speed that matters is between you and ExpatTV’s servers in México and the U.S. Because ExpatTV has to traverse external networks and traffic is carried by multiple providers, ExpatTV traffic is more likely to be negatively impacted by Internet backbone outages, re-routes, and congestion.
Troubleshooting Communication Problems / Stuttering / Buffering / Freezing / Repeating
If you are experiencing trouble with communication problems, stuttering, buffering, freezing, or repeating while viewing Live TV and/or VOD, the problem is (almost) always on your (the client’s) side. It is very rare that a server-side issue causes these issues.
Try these steps in this order:
A) Run a speedtest. On another device (cell phone, tablet, laptop, etc), use speedtest.net or fast.com in a web browser, or download and run the Ookla Speedtest app. If the reported speeds are not in line with what your Internet service should be providing, proceed with step B) below to reboot your Internet equipment. Also, if your Internet provider is Telmex/Infinitum, verify that you do not have a past-due payment with Telmex. If you account is past due, Telmex will slow your speeds down to download speeds of 1-3 Mbps, making streaming impossible.
B) Restart your devices:
- Reboot your Internet router by unplugging/replugging the power. If your Internet service is from Starlink, unplug the power for at least 10 minutes before reconnecting it. This will allow the Starlink dish to completely power down and then reboot when you reconnect the power.
- Once your Internet service is back up, restart any auxillary network devices, such as mesh wifi modules.
- If you have PowerLine modules installed, restart them. PowerLine modules are small white modules plugged into an electrical outlet near your Internet router and near your TV(s). There will be an ethernet cable running from the PowerLine module to your Internet router and to your ExpatTV system(s). Unplug each of these PowerLine modules from the wall, and then replug them. Make sure that they are plugged directly into the wall and that they weren’t accidentally moved to a power strip, voltage regulator, UPS, etc.
- Once all of your devices are back online, restart your ExpatTV system:
a) If you have a Gen1 system, you restart your ExpatTV system by unplugging and replugging the power, causing it to reboot.
b) If you have a Gen2/Gen2+/Gen3 system, you restart by pressing and holding the STB/Power button (top right button on the remote control) and then select Restart when the menu pops up. Try to avoid unplugging the power from Gen2/Gen2+/Gen3 devices. The proper method to reboot is step b) above, not unplugging the power. You should only unplug the power if the light on the front of the ExpatTV system is white (it’s turned on), but you do not have an image on your TV screen, so you therefore cannot see the menu to do a Restart.
C) For Gen2/Gen2+/Gen3 devices, clear the app cache:
- Press the Home button to go to the Home screen.
- From the Home screen, scroll down and select Settings (gear icon). On some systems, the gear icon for Settings is at the top right of the screen – in this case, scroll up, then right to Settings.
- It may prompt for a PIN – enter your PIN and then select the Enter/Tab button on the on-screen keyboard. If you don’t know your PIN, contact us and we will give it to you.
- Scroll down and select Apps.
- Scroll down and select MyTVOnline2 or MyTVOnline3.
- If you have a “Force Close” or “Force Stop” option, select it and confirm. If not, skip this step.
- Scroll down and select Clear Cache and confirm.
- Press the Home button.
- Press and hold the STB/Power button (top right on the remote) until a menu appears, and then select Restart
D) If you are using wifi to connect your ExpatTV system to your Internet service, try to eliminate the wifi variable by (temporarily) connecting your ExpatTV system to your Internet router using an ethernet cable. If the ethernet cable provides better performance, you should consider upgrading your wifi system. In many cases, we recommend a mesh wifi system to improve your wifi coverage and consistency.
E) You may wish to try installing a VPN on your ExpatTV system. If the problem is either congestion, saturation, or routing issues between your ISP and our datacenters, by selecting different servers (cities) for the VPN, you may be able to change your route to the DC, bypassing the issue. It is also possible that your ISP is blocking, throttling, or otherwise interfering with your traffic. A VPN would effectively “hide” your traffic from the ISP’s games. All Formuler systems come with a free trial of ExpressVPN, which you can install from the Market app or from the Google Play Store.
Clear Cache
For Gen2 / Gen2+ / Gen3 devices, clear the app cache:
- Press the Home button to go to the Home screen.
- From the Home screen, scroll down and select Settings (gear icon). On some systems, the gear icon for Settings is at the top right of the screen – in this case, scroll up, then right to Settings.
- It may prompt for a PIN – enter your PIN and then select the Enter/Tab button on the on-screen keyboard. If you don’t know your PIN, contact us and we will give it to you.
- Scroll down and select Apps.
- Scroll down and select MyTVOnline2 or MyTVOnline3.
- If you have a “Force Close” or “Force Stop” option, select it and confirm. If not, skip this step.
- Scroll down and select Clear Cache and confirm.
- Press the Home button.
- Press and hold the STB/Power button (top right on the remote) until a menu appears, and then select Restart
My ExpatTV repeatedly shows the error message “MyTVOnline2 keeps stopping”…Help!
We see this message from time to time on older Gen2 ExpatTV systems. It is usually due to the storage space of the device being full. Do the following steps to free up storage:
- Press the Home button to go to the Home screen.
- Scroll down (or up and to the right for some systems) and select the “gear” icon for Settings
- Some systems will prompt you for a PIN. If asked for a PIN, enter it and then select the Tab or Return key on the on-screen keyboard. If you don’t know your PIN, contact us and we will give you your PIN. If it does not ask you for a PIN, skip this step.
- Select Apps
- Select “See all apps” to expand the list or apps
- If you see ExpressVPN and/or YouTube in the apps, select each and then select Uninstall and confirm to remove these apps and free up the storage they are using.
- Continue scrolling down. If you have the option “Show system apps”, select it.
- Scroll down and select Google Play Services
- Select Clear Data and confirm
- It will bring up another page. Scroll down and select “CLEAR ALL DATA” and confirm by selecting “DELETE” or “OK”
- Select “Uninstall updates” and confirm
- Press the Back button to return to the list of apps
- Scroll down and select Google Play Store
- Select Clear Data and confirm
- Select “Uninstall updates” and confirm
- Restart your ExpatTV system by pressing and holding the STB button and then selecting Restart when the menu pops up
I’m having trouble recording using my Gen2+/Gen3/MOL3 system. Help!
Recording problems are usually due to an issue with the USB memory to which recordings are written.
Unplug the USB chip, do a Restart of the ExpatTV system, then plug it back in.
If that doesn’t work, you can either use a Windows PC to reformat the USB chip using NTFS file system, or follow the steps below to reformat it using the ExpatTV system:
The steps are different for Gen2+ and Gen3 devices…
Reformat USB chip on Gen2+ systems – Z10 Pro/Z10 Pro Max with MyTVOnline2 (MOL2):
- Press Home to go to the home screen
- Scroll down and select the gear icon for Settings
- Select Device Preferences
- Select Storage
- Select USB drive
- Select “Erase & format as removable storage”
- Select Format
Go back to MyTVOnline2 and try to record something. It may prompt you to select your USB device – just accept the default.
Reformat USB chip on Gen3 systems – Z11 Pro Max with MyTVOnline3 (MOL3):
- Press Home to go to the home screen
- Scroll up, then to the right and select the gear icon for Settings
- Select Device Preferences
- Select Storage
- Select USB drive
- Select “Erase & format as removable storage”
- Select Format
Go back to MyTVOnline3 and try to record something. It may prompt you to select your USB device – just accept the default.
Next, check your DVR Settings:
- Within MyTVOnline2/3 (MOL2/MOL3), press the Menu button
- Select Settings
- Select DVR Options
- Make sure the slider for Timeshift is to the right and blue to enable Timeshifting
- Select Recording Storage Location and select the USB Device
- Select Timeshift Storage Location and select the USB Device
- Press the Back button twice to return to Live TV
How do I perform a factory reset of my Z10 – Z10 Neo – Z10SE – Z10 Pro – Z10 Pro Max system?
Z10 – Z10 Neo – Z10SE – Z10 Pro – Z10 Pro Max factory reset:
(revised 2023-07-07)
A factory reset will erase your favorites, your history, and your progress data for series/episodes and movies, and all other data, so if you wish to retain your favorites and progress, you should take photos or make a list.
Before doing the factory reset, make a note of the system’s credentials:
1) Within the MyTVOnline2 app, press the Menu button on the remote control.
2) select Connections
3) select ExpatTV #1 & Video Club
4) select Disconnect
5) select ExpatTV #1 & Video Club
6) select Edit
7) scroll down to the Password field, then right and select the eyeball icon to expose the password
8) take a photo or make a note of the User ID and Password
9) press the back button three times to exit the menus.
Next, perform the factory reset:
1) Press Home to go to the Home screen
2) Scroll down and select Settings
3) If prompted for a PIN, enter your PIN. The default PIN is 0000.
4) Select Device Preferences
5) Scroll all the way to the bottom and select Factory Reset
6) Enter your PIN again
7) Select Factory Reset
8) Select Erase Everything
The system will restart and then start the initial setup process…
1) Go through initial setup:
a) Select Language
b) Select wifi or wired (ethernet) as is appropriate. If using wired (ethernet), select Skip on “Select your Wi-Fi network”. If you select wired (ethernet), select the Automatic (DHCP) option. If using wifi, select Skip on “Setup wired network”.
c) select your Region
d) 24-hour Format = No
e) Date Format = select default
f) It will say “Setup completed!” – press Ok on Complete
2) When setup is complete, it will check for updates and then list the available updates. Select “Start Upgrade” to Install the updates. It will restart after updates are done. If it does not automatically check for updates, select Software Update on the Home screen and install any updates that are listed. If updates are installed, the device will restart.
3) Select the MyTVOnline2 app
4) Select “ExpatTV #1 & Video Club”
5) Enter your User ID
6) Enter your Password
7) Scroll down and select Connect
You should be in!
How do I perform a factory reset of my Z11 Pro – Z11 Pro Max system?
Z11 Pro – Z11 Pro Max Factory Reset
(revised 08/29/2024)
A factory reset will erase your favorites, your history, and your progress data for series/episodes and movies, and all other data, so if you wish to retain your favorites and progress, you should take photos or make a list.
Before doing the factory reset, make a note of the system’s credentials:
1) Within the MyTVOnline3 app, press the Menu button on the remote control.
2) select Content Manager
3) select Content Sources
4) select ExpatTV #1 & Video Club
5) scroll right and select the “eyeball” icon to show hidden info
6) take a photo or make a note of the User ID and Password
7) press the back button three times to exit the menus.
Next, perform the factory reset:
1) press the Home button on the remote control to go to the Home screen
2) scroll to the bottom of the Home screen and select the gear icon for Settings. Some systems will have a newer Launcher app, so you may instead have to scroll up, then right to get to the gear icon for Settings.
3) select “Device Preferences”
4) scroll to the bottom of the list and select “Factory reset”
5) enter default pin of 0000 (for zeroes), then select the check mark on the on-screen keyboard
6) select “Factory reset”
7) select “Erase everything”
The system will restart and then start the initial setup process…
1) go through the setup steps, selecting wifi or wired (ethernet) as is appropriate. If using wired (ethernet), select Skip on “Select your Wi-Fi network”. If using wifi, select Skip on “Setup wired network”. If you select wired (ethernet), select the Automatic (DHCP) option.
2) when setup is complete, it will check for updates and then list the available updates. Select “Start Upgrade” to install the updates. If it does not automatically check for updates, select Software Update in the Quick Settings section on the Home screen and install any updates that are listed. It will restart after the updates are done, bringing you to the device’s Home screen.
3) launch the MyTVOnline3 app.
4) select “Accept” to accept the licensing agreement.
5) with the cursor on “ExpatTV #1 & Video Club”, press OK twice.
6) in the “User ID” field enter your User ID.
7) select the Tab key (right arrow with vertical line) in the bottom right corner of the on-screen keyboard.
8) in the “Password” field enter your password.
9) press the Back button on the remote control to remove the on-screen keyboard, scroll to the right and press the Ok button on the eyeball icon to expose the password – double-check that it is correct.
10) scroll down and select OK.
11) it will connect to our servers and give you a summary of channels, movies, and TV series. Select “Next”.
12) select “Start Setup Wizard”.
13) press the left arrow and select “Next Step” three times.
14) select “Skip for now” when prompted to create Pinned Groups.
15) select “Watch Live Channels”.
You should be in!
How do I perform a factory reset of my Z8 – Z8 Pro – Z+ Neo system?
Z8 – Z8 Pro – Z+ Neo factory reset:
(revised 2023-04-29)
A factory reset will erase your favorites, your history, and your progress data for series/episodes and movies, and all other data, so if you wish to retain your favorites and progress, you should take photos or make a list.
Before doing the factory reset, make a note of the system’s credentials:
1) Within the MyTVOnline2 app, press the Menu button on the remote control.
2) select Connections
3) select ExpatTV #1 & Video Club
4) select Disconnect
5) select ExpatTV #1 & Video Club
6) select Edit
7) scroll down to the Password field, then right and select the eyeball icon to expose the password
8) take a photo or make a note of the User ID and Password
9) press the back button three times to exit the menus.
Next, perform the factory reset:
1) press the Home button on the remote control to go to the Home screen
2) scroll down and select Settings
3) if prompted for a PIN, enter your PIN. The default PIN is 0000.
4) select Storage & Reset
5) select Factory Data Reset
6) select Erase Everything
7) if prompted for a PIN, enter your PIN
The system will restart and then start the initial setup process…
1) Go through initial setup:
a) Select Language
b) Select wifi or wired (ethernet) as is appropriate. If using wired (ethernet), select Skip on “Select your Wi-Fi network”. If you select wired (ethernet), select the Automatic (DHCP) option. If using wifi, select Skip on “Setup wired network”.
c) select your Region/Area
d) 24-hour Format = No
e) Date Format = select default
f) It will say “Setup completed!” – press Ok on Complete
2) When setup is complete, it will check for updates and then list the available updates. Select “Start Upgrade” to Install the updates. It will restart after updates are done. If it does not automatically check for updates, select Software Update on the Home screen and install any updates that are listed. If updates are installed, the device will restart.
3) Select the MyTVOnline2 app
4) Select “ExpatTV #1 & Video Club”
5) Enter your User ID
6) Enter your Password
7) Scroll down and select Connect
You should be in!
My Gen1 device is stuck at “Loading…” Help!
Go through the following steps, and if your DNS is set to Auto, set it to Manual. If it is set to Manual, set it to Auto.
Gen1 – switch to auto DNS from manual 8.8.8.8
1) Unplug and replug the power to reboot the system
2) Wait until you see the screen that says “Loading Portal” and within three seconds press the Menu button, which is to the lower left of the arrow keys, marked with three dots and three dashes.
3) Scroll down and select System Settings
4) Select Network
5) Select Wired (Ethernet)
6) Select Auto (DHCP)
7) Press OK to confirm
8) Press Home twice to return to the System Settings menu
9) Scroll down and select Reboot Device
Gen1 – switch to manual DNS 8.8.8.8 from auto DNS
1) Unplug and replug the power to reboot the system
2) Wait until you see the screen that says “Loading Portal” and within three seconds press the Menu button, which is to the lower left of the arrow keys, marked with three dots and three dashes.
3) Select Network
4) Select Wired (Ethernet)
5) Select Auto (DHCP), manual DNS
6) Enter 8.8.8.8 – use the right arrow key to move to each field, entering an 8 in each field
7) Press the OK button to save – after a moment you should see “successfully saved”
8) Press the Home button three times to return to the System Settings menu
9) Select Reboot Device